Creating your own outdoor furniture is a fun and rewarding way to spruce up your outdoor space without breaking the bank. Whether you want to make comfy chairs, rustic tables, or even stylish decor, DIY projects can add personality and charm to your backyard. Plus, we’ll guide you through the materials you’ll need, step-by-step instructions, and handy tips to ensure you build your furniture with ease and confidence.
Designing a Versatile Garden Bench
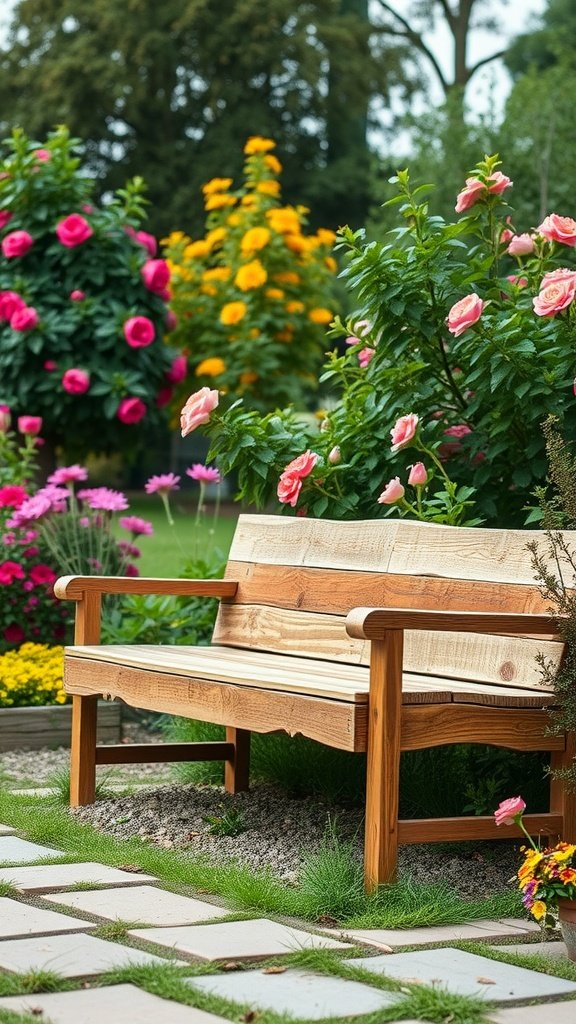
Creating a garden bench can be a fun DIY project that adds charm to your outdoor space. The bench in the image is simple yet elegant, showcasing a natural wood finish that blends nicely with vibrant flowers around it. This bench is a perfect spot to sit back and enjoy the beauty of your garden.
When it comes to DIY outdoor furniture, a garden bench is versatile. It can serve as a seating area, a place for morning coffee, or even a decorative piece among your flowers. Let’s break down how to make your own!
Making a Functional Outdoor Coffee Table
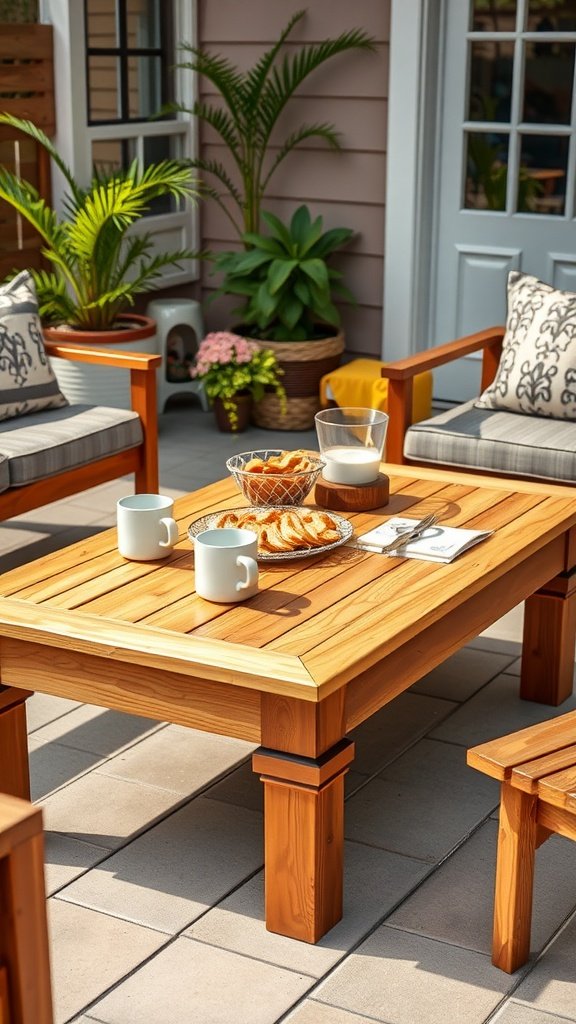
Creating a functional outdoor coffee table is a fun and rewarding project. This table serves as a perfect centerpiece for your patio or backyard. Picture enjoying your morning coffee or evening snacks with friends around this lovely piece.
To make your own outdoor coffee table, you’ll need some basic materials and tools. Using DIY outdoor furniture methods can save you money and give you a chance to customize your space.
Building a Fire Pit Seating Area

Creating a cozy fire pit seating area is a wonderful way to enjoy your backyard. The image shows a warm fire illuminating a circle of inviting chairs, perfect for gathering with friends or family. This setup not only adds warmth but also a focal point for those evening chats under the stars.
To start your DIY outdoor furniture project, you can create your own seating using simple materials like wood pallets. These can easily be transformed into comfortable chairs that fit your style and space.
Assembling a Charming Swing Bed
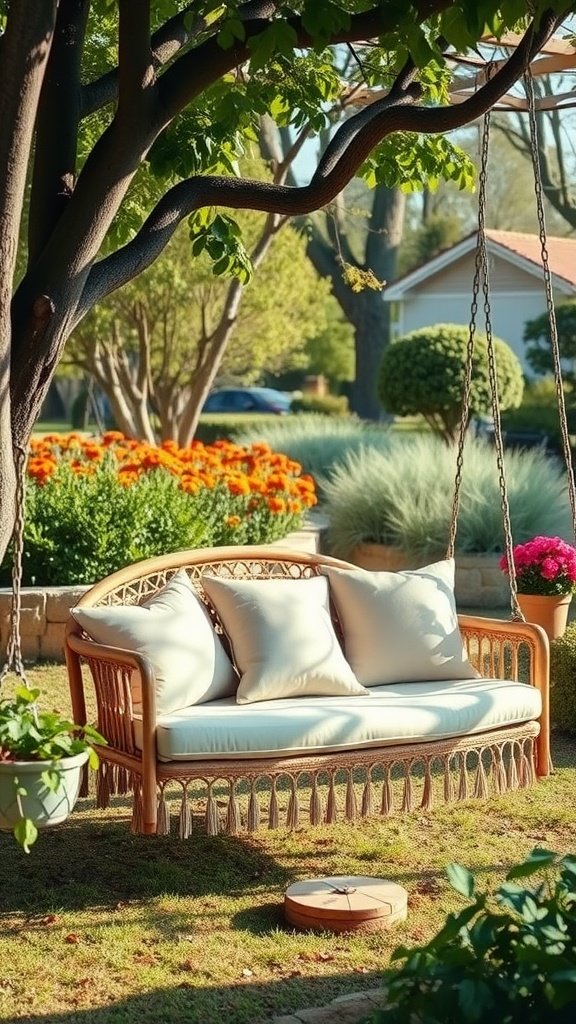
Creating a swing bed can transform your outdoor space into a cozy retreat. Picture it: a beautiful swing bed hanging from a sturdy tree, surrounded by colorful flowers and lush greenery. It’s not just a place to relax; it’s a stylish statement piece that adds charm to any yard.
For this DIY project, you’ll need some basic materials and tools to get started. A swing bed can be made from wood, cushions, and suspension hardware. Let’s break down what you will need and how to put it all together.
Constructing a Modern Pallet Sofa
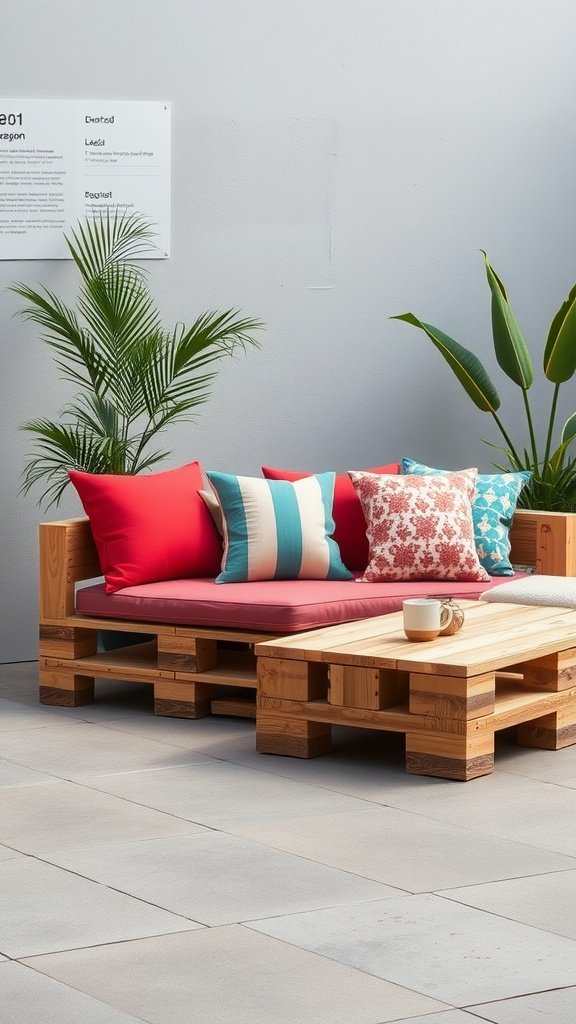
Creating a modern pallet sofa is a fun and rewarding project. This DIY outdoor furniture piece can transform your patio or garden into a cozy gathering spot. With just a few materials and some basic tools, you can make a stylish and comfortable sofa that’s perfect for relaxing outside.
To start, gather your materials. You’ll need wooden pallets, a sanding block, wood screws, and outdoor cushions. Choose cushions that are weather-resistant to ensure they last. A few decorative pillows can add flair and comfort.
Next, prepare your workspace. Sand down the pallets to avoid splinters. Lay out two pallets for the base and one for the backrest. You can stack the pallets for extra height or keep them lower for a more casual look.
Use wood screws to secure the pallets together. Make sure everything is sturdy. Once assembled, place your outdoor cushions on top. This will give your sofa a cozy feel while making it inviting.
Don’t forget to accessorize! Add those decorative pillows for extra comfort and style. A small coffee table can complete the look. Opt for a pallet table to match your sofa for a cohesive design.
For maintenance, keep your sofa clean and bring in the cushions during heavy rain. This simple project makes a lovely addition to your outdoor space and is a great way to enjoy those sunny days.
Creating a Cozy Outdoor Lounge Set
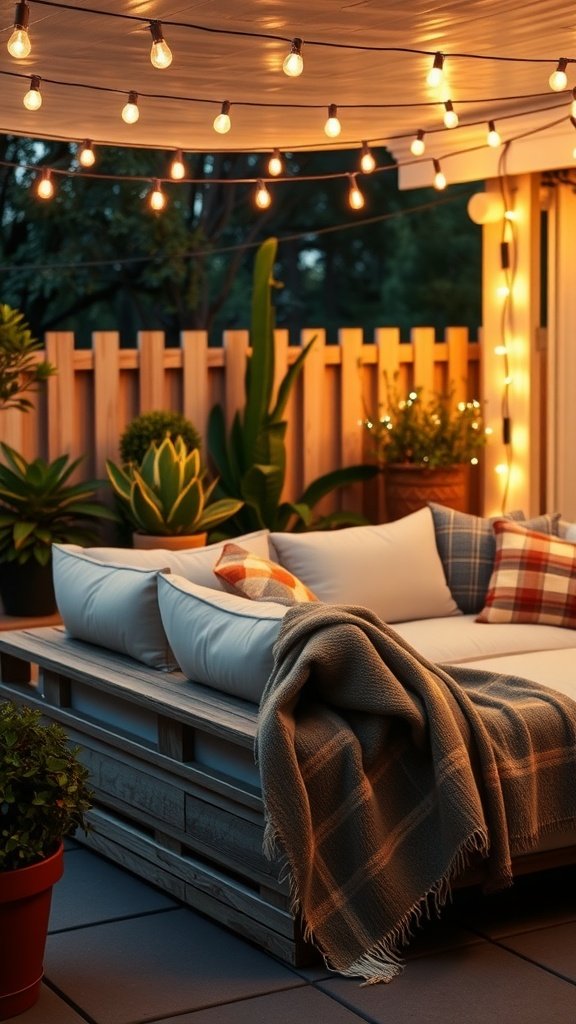
Outdoor spaces can be transformed into inviting lounges with just a bit of creativity. One popular choice is to use DIY outdoor furniture, particularly pallet furniture, which is both affordable and stylish.
Imagine a comfy lounge set made from repurposed pallets, perfect for relaxing under the stars. To create this cozy setup, you can easily make a pallet sofa.
Start by gathering your materials. You’ll need:
- Wooden pallets (2-3 depending on size)
- Pallet wood for the backrest
- Pillows and cushions for comfort
- A soft throw blanket
- Sandpaper for smoothing edges
- Outdoor paint or stain (optional)
Next, let’s get into the instructions:
- Sand down the pallets to remove splinters.
- Stack the pallets to your desired height for the sofa base.
- Attach pallets for the backrest securely.
- Optionally, paint or stain the wood for a personal touch.
- Add cushions and a cozy blanket for warmth.
Pro tips: Use outdoor fabric for the cushions to withstand weather changes. Also, consider adding some string lights overhead for a magical nighttime glow, creating a warm, inviting atmosphere.
With these simple steps, you can create a comfy lounge area in your backyard that’s perfect for gatherings or quiet evenings. DIY outdoor furniture not only looks great but also brings functionality, making your outdoor space a true extension of your home.
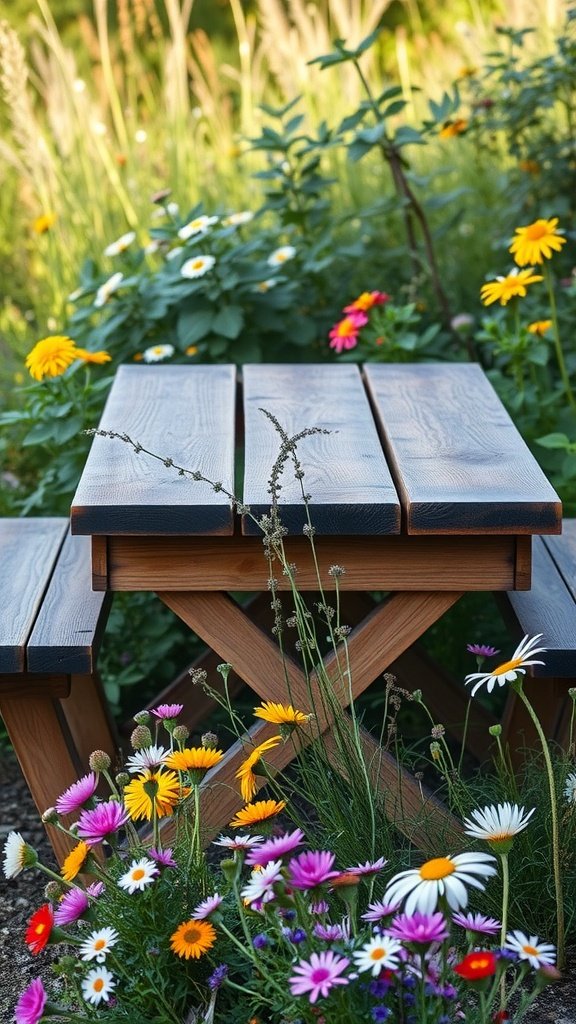
Building a Rustic Wooden Picnic Table
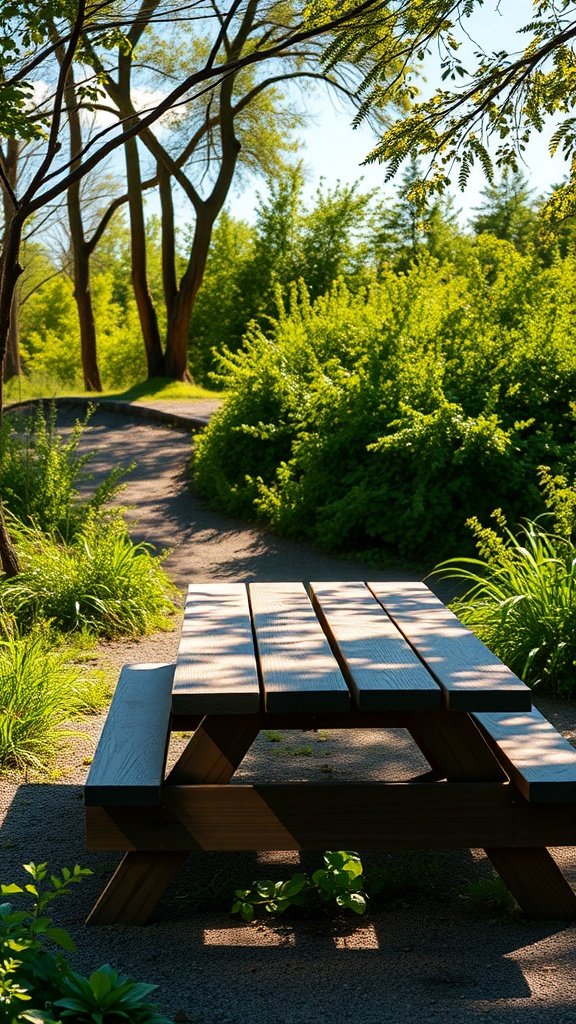
Building a rustic wooden picnic table is a fun project that brings functionality and charm to your outdoor space. The image captures a sturdy picnic table surrounded by lush greenery, perfect for family meals or gatherings with friends. This table not only adds style but also creates a spot where memories can unfold.
To start, let’s lay out the materials needed for this DIY outdoor furniture project. You’ll want to gather the following items:
- Pressure-treated lumber (4x4s and 2x6s)
- Wood screws (3 inches)
- Wood glue
- Sandpaper (medium and fine grit)
- Outdoor wood stain or sealant
Now, onto the tools and equipment required:
- Measuring tape
- Saw (circular or miter saw)
- Drill
- Clamps
- Paintbrush or roller for stain
Here are the step-by-step instructions to build your picnic table:
- Measure and cut the wood according to your desired table size.
- Assemble the table legs using the 4x4s, securing them with screws and wood glue.
- Attach the tabletop using the 2x6s, leaving a small gap between each board for drainage.
- Sand the entire table to remove rough edges and splinters.
- Apply outdoor wood stain or sealant to protect it from the elements.
Pro tip: Make sure to let the stain dry completely before using the table. This rustic picnic table will stand out in your yard, inviting everyone to sit and enjoy the outdoors. With a bit of effort, you’ll have a cozy spot for meals and relaxation, making it a great addition to your DIY outdoor furniture collection.
Crafting a Stylish Adirondack Chair
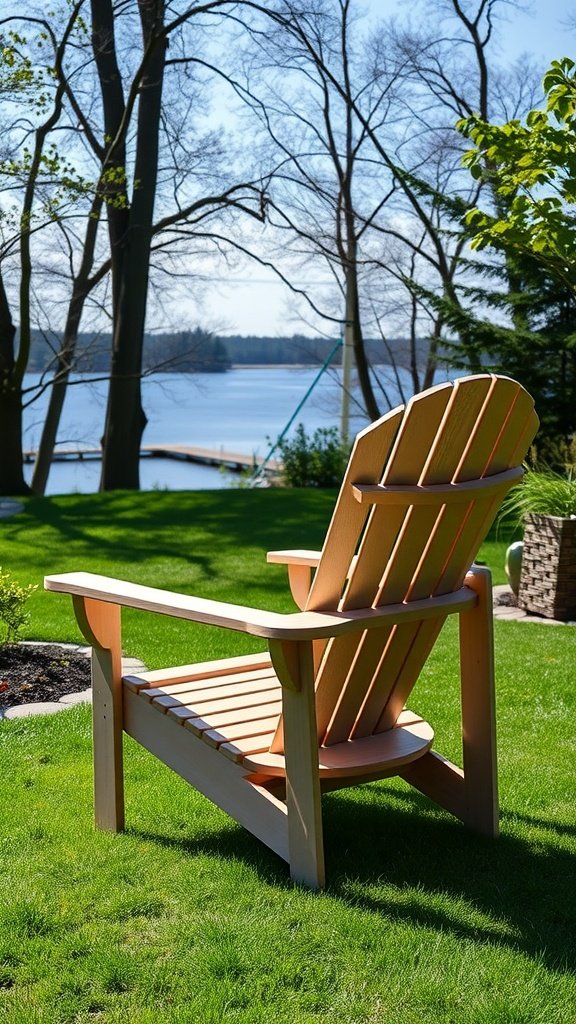
Imagine lounging outdoors, soaking up the sun in a beautiful Adirondack chair. These chairs are not only comfy but also add a touch of charm to any yard. Building your own chair can be a fun project, allowing for customization and satisfaction.
For this DIY outdoor furniture project, you’ll need some basic materials and tools. Here’s what you’ll need:
Materials Needed:
- Wood boards (cedar or pine works well)
- Wood screws
- Wood glue
- Outdoor wood finish or sealant
Tools Required:
- Saw
- Drill
- Screwdriver
- Measuring tape
- Sander
Now, let’s get into the steps to create your own Adirondack chair:
Instructions:
- Cut your wood boards into the necessary lengths for the seat, backrest, and legs.
- Assemble the seat by attaching the slats to the frame using wood screws.
- Attach the backrest to the seat at a comfortable angle.
- Secure the legs to the seat, ensuring stability.
- Sand down any rough edges and apply the outdoor finish.
Pro tips: Make sure to measure twice and cut once! This will ensure all pieces fit together nicely. Choosing weather-resistant wood will help your chair last longer.
Creating DIY outdoor furniture, like this Adirondack chair, not only enhances your outdoor space but also gives you a sense of accomplishment. So grab your tools and get started!
Designing a Unique Planter Bench
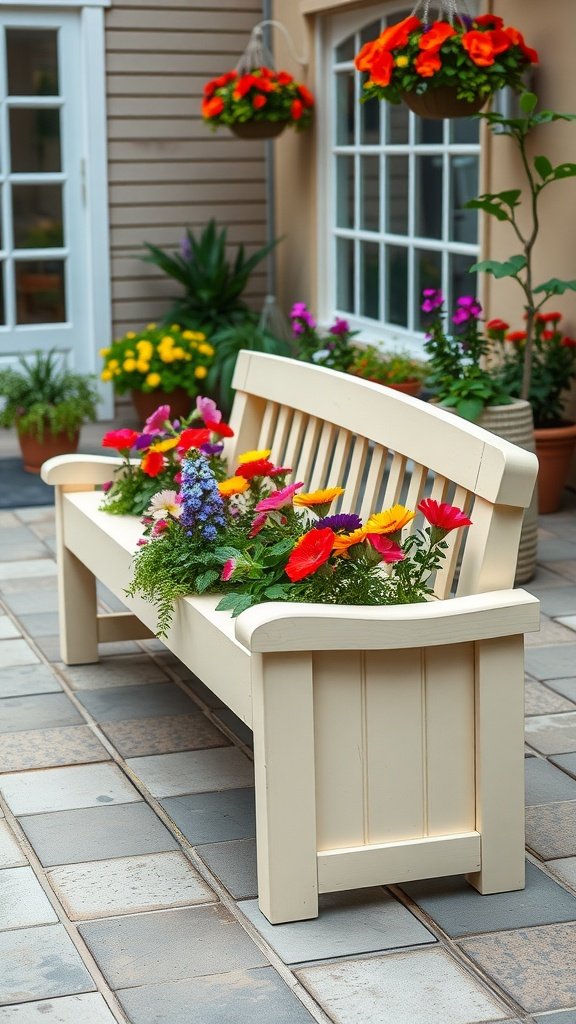
A planter bench brings a delightful twist to your outdoor space. It serves as both a comfortable seating option and a vibrant flower display. Imagine relaxing outside while surrounded by blooming plants! This piece not only enhances the look of your patio but also makes a unique statement.
To get started with your DIY outdoor furniture project, you’ll want to gather a few materials and tools. The charm of this bench lies in its functionality and aesthetics. You can fill it with seasonal flowers or even herbs, adding a personal touch to your garden.
Creating a Sleek Outdoor Dining Set
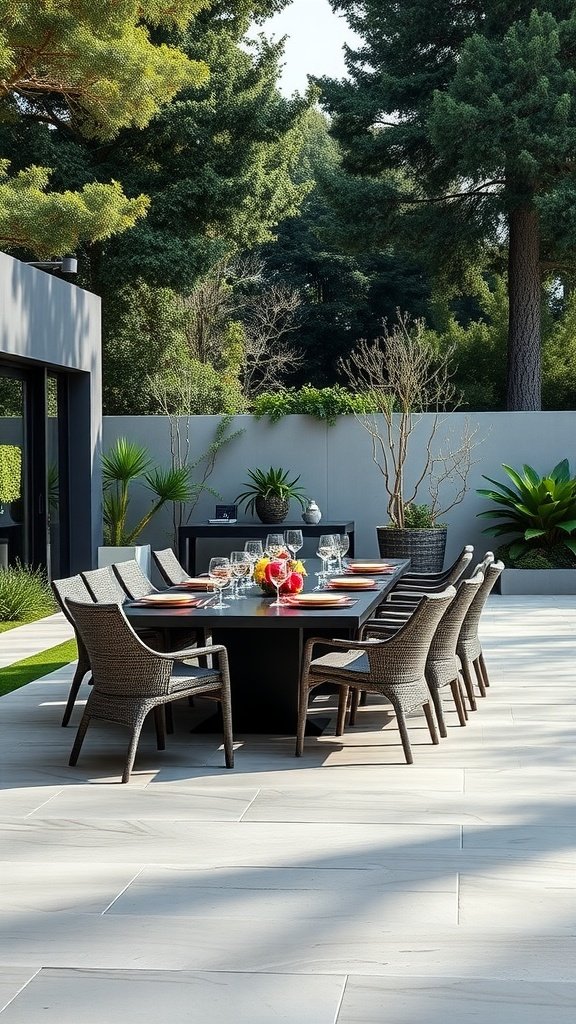
Imagine transforming your backyard into a stylish dining area with a DIY outdoor furniture project. A sleek outdoor dining set can be a fantastic centerpiece for gatherings or quiet dinners under the stars.
For this project, you can create a stunning table and chairs using durable materials that withstand the elements. Not only will this enhance your outdoor space, but it also allows for creativity and personalization.
Constructing a Roll-Away Bar Cart
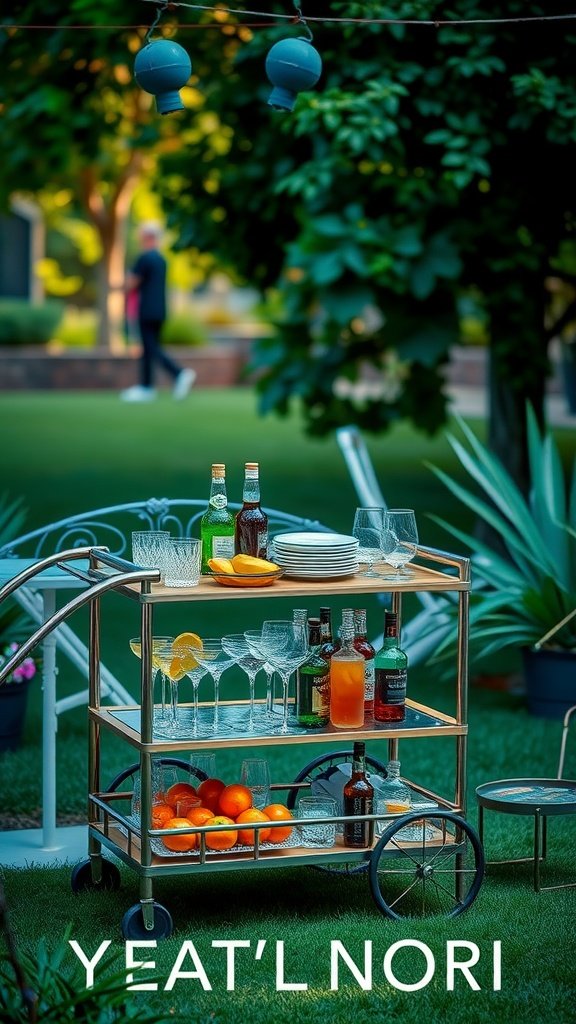
Creating a roll-away bar cart is a fun and practical DIY outdoor furniture project. You can easily move it around your patio or garden, making it perfect for entertaining guests or enjoying drinks outdoors.
This particular cart is spacious with multiple levels for storing drinks, glasses, and snacks. Its wheels make it easy to transport, while the stylish design adds a touch of flair to your outdoor area.
Let’s dive into the materials needed and the simple steps to get you started on your own bar cart!
Building a Reclaimed Wood Garden Table
Creating your own garden table using reclaimed wood is a satisfying project. It not only adds character to your outdoor space but also helps the environment by reusing materials.
The table in the image showcases a sturdy design with a simple yet stylish appearance. It perfectly blends with the surrounding flowers, making it an inviting spot for gatherings or a quiet cup of coffee.
Designing a Compact Balcony Chair

Creating a cozy spot on your balcony can be a delightful DIY project. A compact chair is perfect for small spaces. It lets you enjoy the view without taking up too much room. You might find a simple design that fits well within your balcony’s vibe.
For a practical DIY outdoor furniture option, consider a wireframe chair. This type of chair is lightweight and easy to move. Plus, its open design gives a sense of space, making it ideal for tight areas.
Creating a DIY Hammock Stand
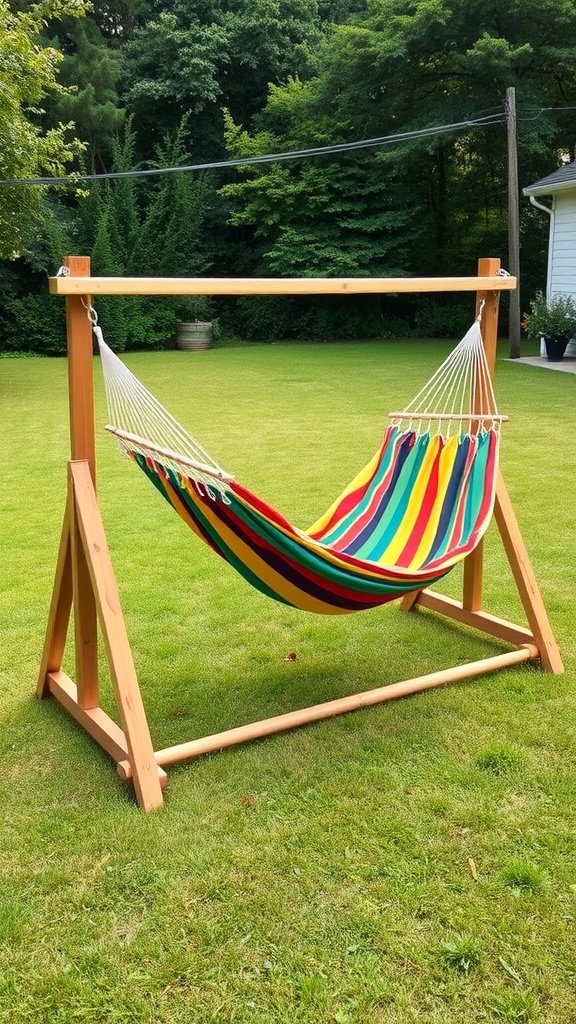
A DIY hammock stand can transform your outdoor space into a cozy retreat. It’s perfect for those lazy afternoons or evenings spent stargazing in your backyard. The vibrant colors of the hammock in the image show just how inviting and fun this setup can be.
To get started, you’ll need some basic materials and tools. This project is quite straightforward and can be done over a weekend.
Making a Contemporary Outdoor Lounger

When it comes to DIY outdoor furniture, creating a contemporary outdoor lounger is a fun project. This piece not only enhances your outdoor space but also provides a comfy spot to relax.
The image shows a stylish lounger by the pool. With sleek lines and a modern design, it’s perfect for soaking up the sun or enjoying a good book.
To make a cozy lounger, you’ll need some basic materials and tools. Don’t worry; this project is simple and can be done over a weekend!
Assembling a Multi-Use Storage Bench
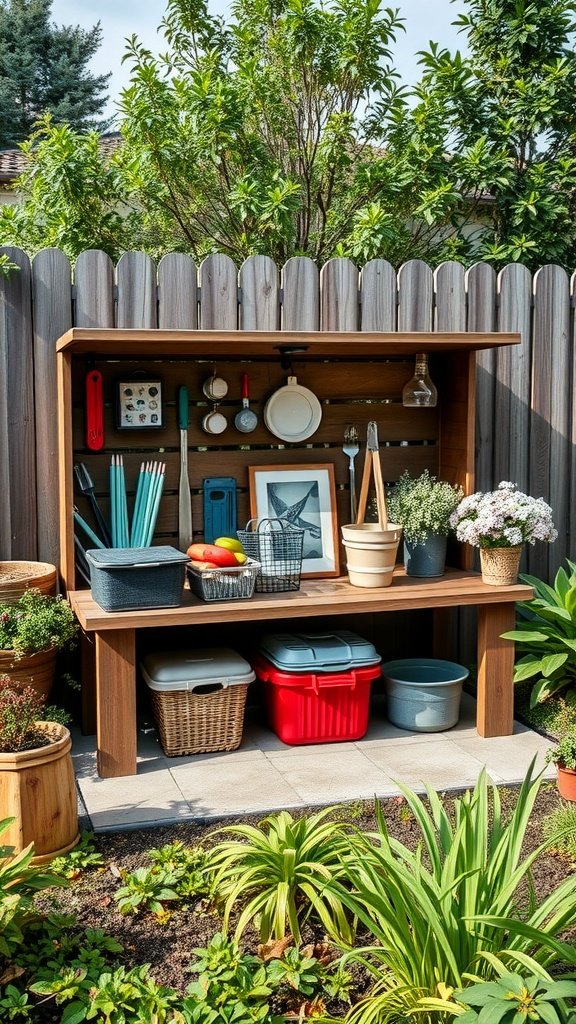
This storage bench is perfect for your outdoor space. It combines seating and storage, making it a great addition to any garden or patio. The bench has a spacious top for sitting and a lower shelf for organizing tools and supplies. With a natural wood finish, it blends well with the greenery around it.
Creating DIY outdoor furniture like this bench can be a fun project. You can customize the size and color to fit your style. Plus, it’s a fantastic way to keep your outdoor area tidy while providing a comfortable place to relax.
Building a Durable Deck Chair

Creating a comfortable deck chair can make your outdoor space inviting and relaxing. This DIY project is not only fun but also rewarding. You’ll have a stylish seat to enjoy your outdoor moments.
The chair in the image shows a simple design with a sturdy wooden frame and a striped fabric seat. This combination is both durable and aesthetically pleasing, making it a perfect addition to any backyard.
Constructing a Personalized BBQ Station

Creating a DIY outdoor furniture piece like a BBQ station can really enhance your backyard experience. The image shows a stylish BBQ setup with a grill, prep space, and storage options. This is perfect for those who love to cook outdoors.
To build your BBQ station, you’ll need a few essential materials. These include concrete blocks for the base, a grill, a countertop (granite works well), and storage cabinets. You can also incorporate a sink and shelving for convenience.
Designing a Fun Outdoor Game Table

Gathering around an outdoor game table is a great way to enjoy the fresh air while having fun with friends and family. The image shows a lively group playing a board game together, surrounded by snacks and drinks. This setting creates a perfect atmosphere for laughter and friendly competition.
Creating your own DIY outdoor furniture, like this game table, can be a rewarding project. You can customize it to fit your space and style. Let’s look at the materials needed and steps to create a simple yet functional outdoor game table.
Creating a Vintage Style Garden Swing
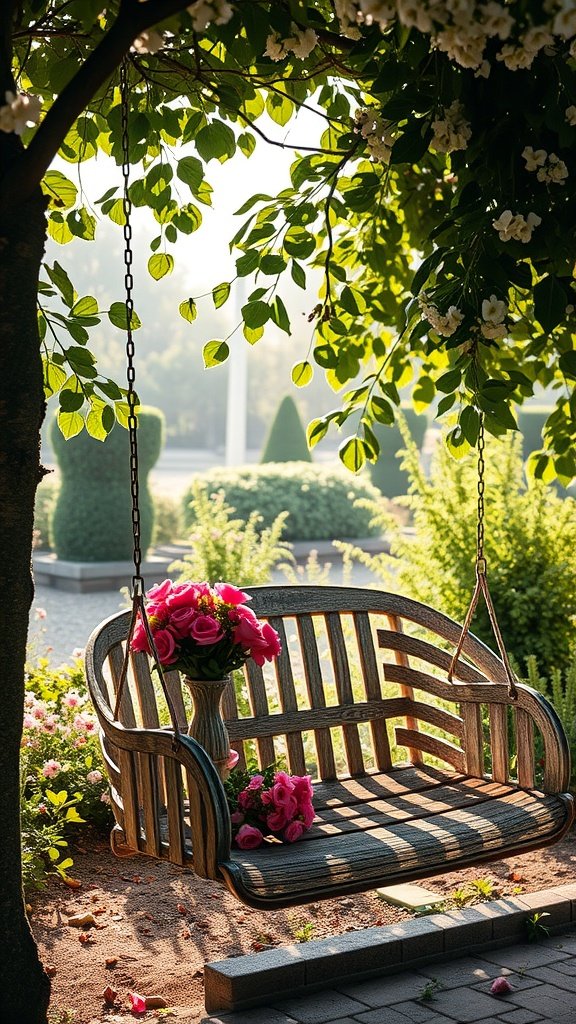
A vintage-style garden swing can be a charming addition to your outdoor space. Imagine relaxing with a book or enjoying a cup of coffee while gently swaying in the breeze. It adds a cozy touch to any garden and is a fun DIY outdoor furniture project.
To build your swing, you’ll need some basic materials and tools, but don’t worry—they’re easy to find. This project not only beautifies your yard but also provides a lovely spot for relaxing.
Building a Relaxing Sun Lounger

Creating a sun lounger is a fantastic way to enhance your outdoor space. This simple DIY project will let you soak up the sun in comfort. Imagine lounging on your deck, sipping a drink, and enjoying a good book. With just a few materials and some time, you can craft your own cozy spot.
Materials Needed:
- Wood planks (cedar or pressure-treated pine)
- Wood screws
- Sandpaper
- Paint or wood sealant (optional)
- Cushions for comfort
- Sunshade (optional)
Instructions:
- Start by measuring and cutting the wood planks to your desired lounger size.
- Sand the edges to ensure there are no splinters.
- Assemble the frame using wood screws, creating a supportive base.
- Add a reclining mechanism using hinges for adjustable comfort.
- Paint or seal the wood for protection against the elements.
- Finish by adding cushions for a comfy touch.
Once it’s ready, you’ll have a beautiful piece of DIY outdoor furniture that invites relaxation. Remember to position it where you can enjoy the sun while being shaded from harsh rays. Having your own sun lounger can turn your backyard into a personal retreat.
Pro Tips:
- Choose weather-resistant materials to ensure durability.
- Consider adding wheels to move it easily around your space.
- Use outdoor fabric for cushions to withstand moisture.
Building your own sun lounger can be a fun project. It’s an easy way to create DIY outdoor furniture that fits your style and needs.