If you’re looking for fun and easy DIY projects that can fill your weekends and even make some extra cash, you’re in the right place. This guide features a variety of delightful easy DIY crafts to make and sell, complete with all the instructions you need, plus tips to help you get the best results. Whether you’re a total beginner or a crafty enthusiast, there’s something here for you to create and share with others.
This post may contain affiliate links, which means I earn a small commission if you purchase through my links, at no extra cost to you. As an Amazon Associate, I earn from qualifying purchases. Thanks for supporting the blog!
1. Easy DIY Crafts to Make and Sell: Upcycled Wooden Furniture
Upcycled wooden furniture is a fantastic way to breathe new life into old pieces. Take a look at this charming chair, with its playful colors and unique design. It’s not just a seat; it’s a statement piece that adds character to any space.
Making upcycled furniture can be a rewarding project, especially if you plan to sell your creations. This chair is a perfect example of how a little paint and creativity can transform something worn out into something beautiful.
Here’s how you can create your own upcycled wooden furniture piece:
What You Need to Make the Project:
- Old wooden chair
- Sandpaper
- Primer and paint
- Brushes and a roller
- Sealant (for durability)
How to Make the Project:
- Start by sanding the chair to remove any old paint and smooth the surface.
- Apply a coat of primer to help the paint adhere better.
- Once the primer is dry, paint the chair with your chosen colors. A blend soft white or pastel shades can modernize the look.
- Finish with a sealant to protect your work and ensure longevity.
A Paint Sprayer may be useful.
Extra Tips:
- Always work in a well-ventilated area.
- Take your time with the sanding for a smooth finish.
- Consider adding stencils or decals for a unique design.
Repurposing furniture is one of the best easy DIY crafts to make and sell. Your creativity can lead to beautiful home decor that others will love!
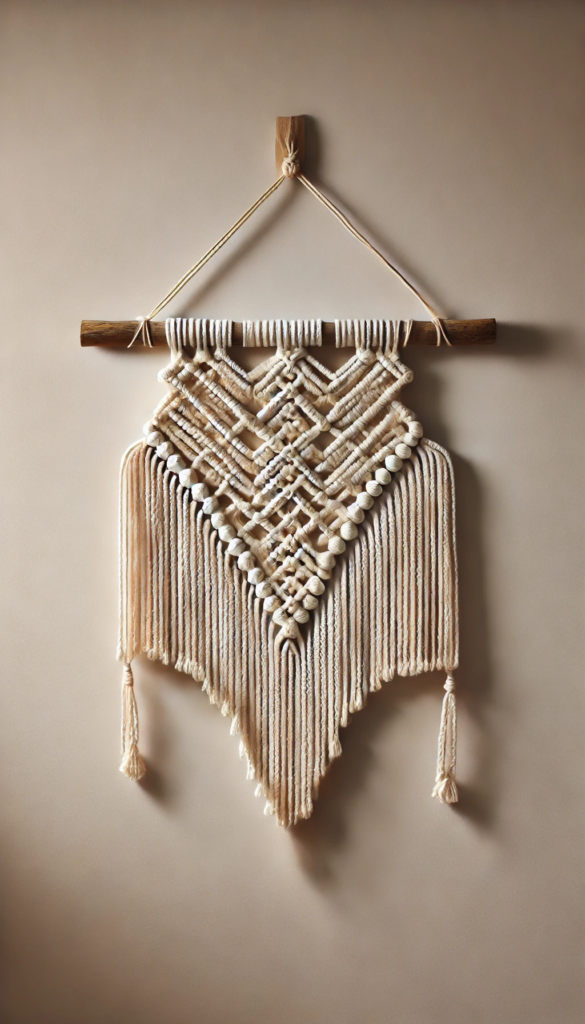
2. Macramé Wall Hangings
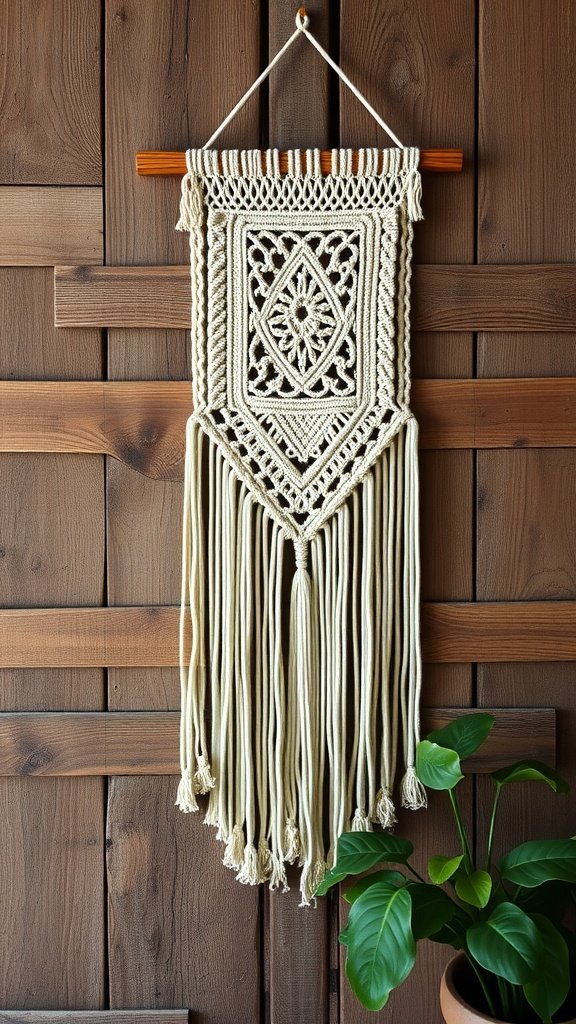
Macramé wall hangings are a fun and creative way to add some flair to any room. They are made using knotting techniques that create beautiful, intricate designs. The image shows a stunning example, featuring a mix of patterns and fringes that make it visually appealing.
Making these wall hangings is also a great way to create unique pieces to sell. They are popular in home decor and can attract customers looking for something special. Let’s dive into how you can make your own!
DIY Macramé Wall Hanging Tutorial
🧵 What You Need:
- Macramé cord (4mm, 100 ft) – natural cotton recommended
- Wooden dowel or driftwood (12-18 inches)
- Measuring tape
- Scissors
- Comb (optional, for fringe)
🪢 Step-by-Step Instructions:
Step 1: Cut Your Cords
- Cut 6 cords at 12 ft (144 inches) each (for knots and structure)
- Cut 2 cords at 10 ft (120 inches) each (for additional design)
- Cut 1 cord at 3 ft (36 inches) (for hanging the dowel)
Step 2: Attach Cords to the Dowel
- Tie the 3 ft cord to each end of the dowel for hanging.
- Use a Lark’s Head Knot to attach all 8 long cords to the dowel, spacing them evenly.
Step 3: Make Square Knots
- Work in groups of four cords:
- Cross the left cord over the center cords and under the right cord.
- Pull the right cord under the center cords and through the loop.
- Repeat on the opposite side to complete the square knot.
- Make a row of square knots across all cords.
Step 4: Create a Chevron Pattern
- Leave an inch below the first row and repeat square knots, but stagger them for a V-shape.
- Continue for 4 rows, leaving space between each.
Step 5: Add Fringe
- Comb out the bottom of the cords for a soft fringe.
- Trim to form a symmetrical angle or a straight line.
💡 Extra Tips:
✅ Cord Type: Use 100% cotton for a soft, boho look.
✅ Knot Tension: Keep knots consistent, but not too tight.
✅ Finishing: Spray with water and comb the fringe for a smooth finish.
✅ Customization: Add wooden beads or dip-dye the fringe for a unique style.
💰 Selling Tip:
- Market your macramé hangings as “Boho Home Decor” or “Minimalist Wall Art” on Etsy, Instagram, or craft fairs.
- Bundle with other handmade home decor for higher sales.
3. Easy DIY Crafts to Make and Sell: Decorative Mason Jar Lanterns
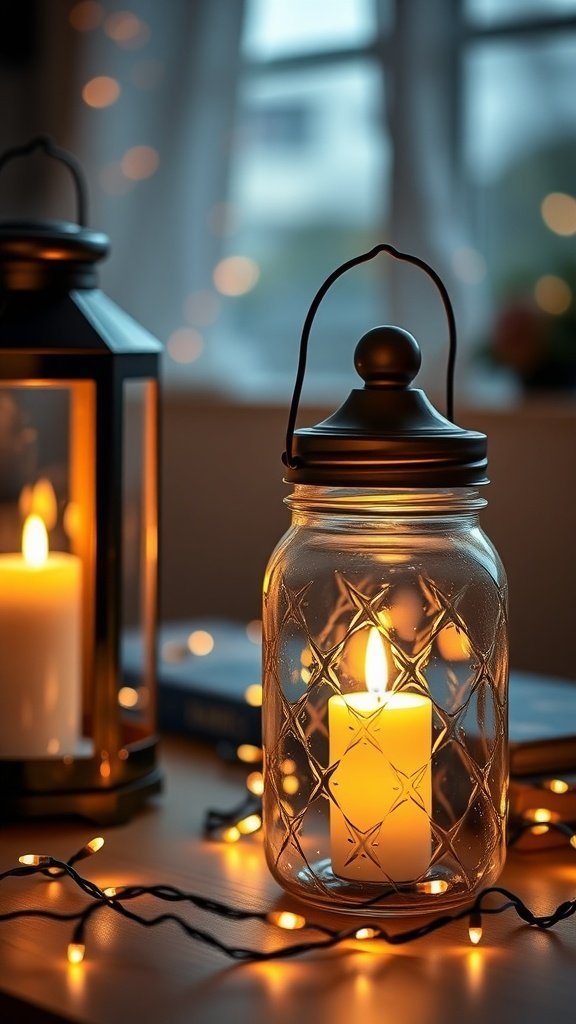
Decorative mason jar lanterns are a fun and simple project that can brighten up any space. They offer a charming way to add light and personality to your home. In the image, you can see a beautifully lit lantern beside a cozy setting, creating a warm vibe perfect for gatherings or quiet evenings.
Mason Jars with Lids 12 Pack x 32oz and
Flameless Votive Candles 24 Pack 200+ Hour battery operated LED tea lights in Warm White
These lanterns make for lovely decor pieces and can be sold at craft fairs or online. They have a universal appeal and can be customized to fit different themes and occasions.
4. Handmade Scented Candles
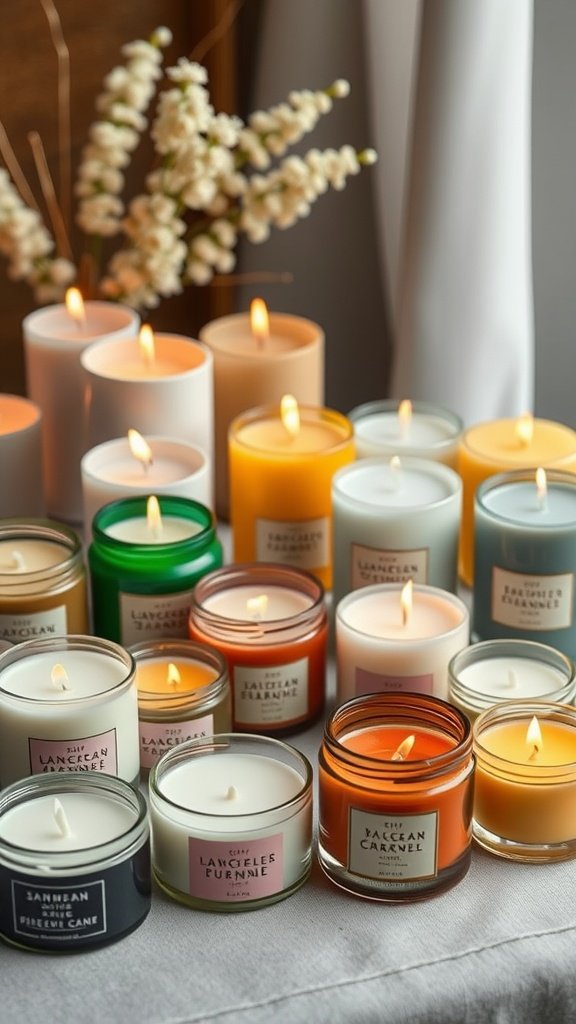
Scented candles are a fantastic DIY project that you can easily make and sell. Not only do they create a cozy atmosphere, but they also make great gifts. The image shows a beautiful array of colorful candles, each with its unique scent and style. This variety can attract different customers looking for that perfect candle to brighten their space.
Making your own candles allows you to experiment with fragrances and colors making them an easy DIY craft to make and sell. You can use natural ingredients, which is a bonus for eco-conscious buyers. Candles can be customized for any occasion, such as holidays or personal celebrations, making them a versatile product.
Candle Making Kit for Adults with Hot Plate, DIY starter Soy Candle Making Supplies/Kit
🕯️ DIY Homemade Candles: A Simple Guide for Beginners
🧺 What You Need:
- Wax: Soy wax flakes (best for beginners) or beeswax
- Wicks: Pre-waxed cotton wicks with metal tabs
- Containers: Mason jars, glass cups, or tins (heat-safe)
- Fragrance Oil: (optional) Essential oils or candle fragrance oils
- Dye Chips: (optional) for colored candles
- Double Boiler: Or a heat-safe bowl over a saucepan
- Thermometer: (Candle or candy thermometer)
- Wooden Skewers or Wick Holders: To hold wicks in place
- Glue Dots or Hot Glue Gun: To secure the wicks
📝 Step-by-Step Instructions:
Step 1: Prepare Your Containers
Clean your containers with soap and water, then dry them completely.
Use a glue dot or hot glue to attach the wick to the center bottom of the container.
Use a wick holder or skewer to hold the wick upright and centered.
Step 2: Melt the Wax
Fill the bottom of a double boiler with water and place wax flakes in the top pot.
Heat on medium, stirring occasionally, until fully melted.
Use a thermometer and remove from heat when the wax reaches about 180°F (82°C).
Step 3: Add Fragrance and Color (Optional)
Let the wax cool to about 140°F (60°C) before adding fragrance (about 1 oz of fragrance per pound of wax). Stir well.
Add dye chips if desired, stirring until fully blended.
Step 4: Pour the Wax
Carefully pour the wax into your prepared containers, leaving about ½ inch from the top.
Hold the wick straight and steady.
Step 5: Let Candles Set
Allow the candles to cool and harden for at least 24 hours.
Trim the wick to about ¼ inch for a safe, even burn.
💡 Extra Tips:
✅ Wax Type: Soy wax burns cleaner and longer. Beeswax has a natural, sweet scent.
✅ Wick Size: Use thicker wicks for larger containers.
✅ Scent Strength: Use up to 10% fragrance oil per wax weight for a strong scent throw.
✅ Curing Time: Let candles cure for 48 hours to a week for the best scent throw.
✅ Safety: Never leave burning candles unattended and keep away from drafts.
💰 Selling Tip:
Offer themed sets, such as “Relaxation” (lavender, chamomile) or “Holiday Cheer” (cinnamon, pine).
Use eco-friendly packaging and branded labels for a professional touch.
Sell on platforms like Etsy, local markets, or through social media.
5. Easy DIY Crafts to Make and Sell: Personalized Leather Keychains
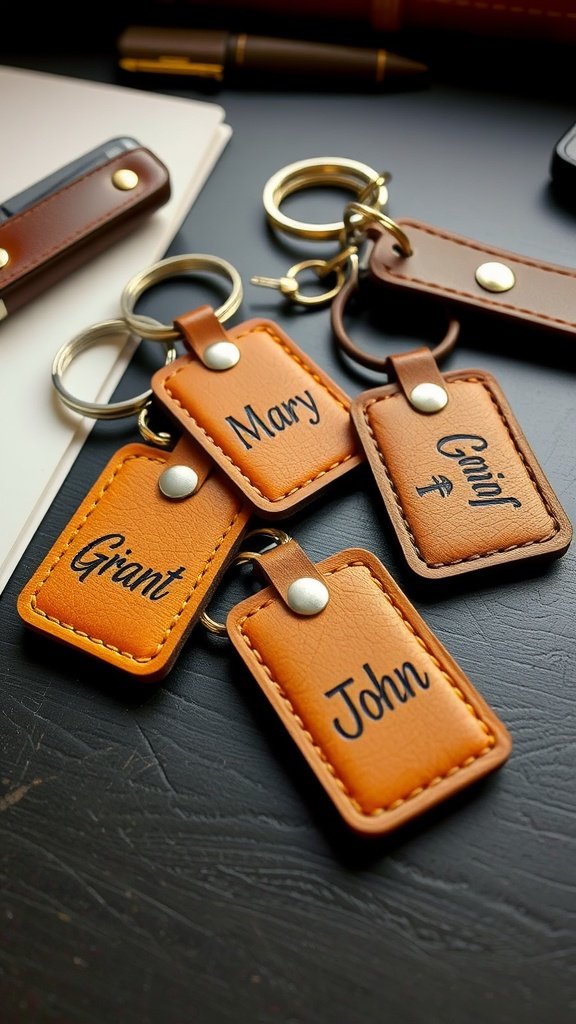
Personalized leather keychains are a fantastic way to mix creativity with functionality. These little accessories are not just practical, but they add a personal touch to everyday items. The image shows beautifully crafted leather keychains, each featuring names embroidered on them. This gives them a unique flair, making them perfect gifts or items to sell.
Creating these keychains is simple and fun. With just a few materials, you can make items that are both stylish and useful. Plus, they’re great crafts to make and sell DIY, appealing to a wide audience.
Here’s what you need to make the project:
🧵 DIY Personalized Leather Keychains: A Simple Guide for Beginners
🧺 What You Need:
- Leather strips: 1 inch wide and 4-6 inches long (vegetable-tanned leather works best)
- Key rings: Split rings or lobster clasps
- Leather punch or rotary punch (for making holes)
- Leather stamping set (alphabet and symbols for personalization)
- Mallet or hammer (for stamping)
- Rivets and a rivet setter (or Chicago screws)
- Cutting mat and craft knife (or rotary cutter)
- Ruler and pencil
- Leather dye or acrylic paint (optional)
- Leather conditioner or beeswax (optional)
📝 Step-by-Step Instructions:
Step 1: Cut Your Leather Strip
Measure and cut your leather strip to approximately 4-6 inches long and 1 inch wide.
Round the edges or cut a pointed end for a finished look.
Step 2: Punch a Hole for the Key Ring
Use a leather punch to create a hole about ½ inch from one end of the leather strip.
Step 3: Personalize Your Keychain
Dampen the leather slightly with a sponge to soften it.
Arrange your chosen letters or symbols from the stamping set.
Place the stamp on the leather and hit it firmly with a mallet. Repeat for each letter.
Step 4: Add Color or Finish (Optional)
If you wish to add color, apply leather dye or acrylic paint evenly using a cloth or brush.
Let it dry completely, then apply a leather conditioner or beeswax for protection.
Step 5: Assemble the Keychain
Slide the leather strip through the key ring.
Fold the leather strip over, aligning the punched hole.
Secure the folded end with a rivet or Chicago screw. Use a rivet setter and hammer to fix it firmly.
Step 6: Trim and Finish
Trim any rough edges and sand them for a smooth finish.
Optionally, burnish the edges with a bit of water and a smooth tool for a polished look.
💡 Extra Tips:
✅ Leather Choice: Vegetable-tanned leather is best for stamping and customizing.
✅ Personalization: Try adding initials, dates, or small icons for uniqueness.
✅ Finishing: Condition the leather regularly to maintain its look and softness.
✅ Tool Safety: Always cut and punch leather on a cutting mat to protect surfaces.
💰 Selling Tip:
Offer custom options like initials, names, or special dates.
Market them as gifts for birthdays, anniversaries, or corporate events.
Package them in a small cloth pouch or a kraft box for a premium feel.
6. Customized T-Shirts with Iron-On Transfers
Customized t-shirts are a fun and creative way to express personal style. The image shows a variety of t-shirts featuring bold letters and graphics, perfect for anyone looking to add a personal touch to their wardrobe. These shirts can be made with iron-on transfers, making it easy for anyone to create unique designs at home.

What you need to make the project:
- Plain t-shirts in various colors
- Iron-on transfer paper
- Inkjet printer
- Scissors
- Iron
- Design software or templates
How to make the project:
- Create your design using design software or choose from online templates.
- Print your design onto the iron-on transfer paper following the manufacturer’s instructions.
- Cut out the design carefully.
- Preheat your iron according to the transfer paper instructions.
- Place the design face down on the t-shirt where you want it.
- Iron over the design with firm pressure for the recommended time.
- Let it cool before peeling off the backing.
Extra tips:
- Wash the shirts inside out to preserve the design.
- Experiment with different colors and patterns for a fun variety.
- Consider selling these customized shirts at local markets or online. They make great gifts and are perfect for events! A great example of easy DIY crafts to make and sell that you can add to your DIY products.
7. Easy DIY Crafts to Make and Sell: Custom Painted Wine Glasses
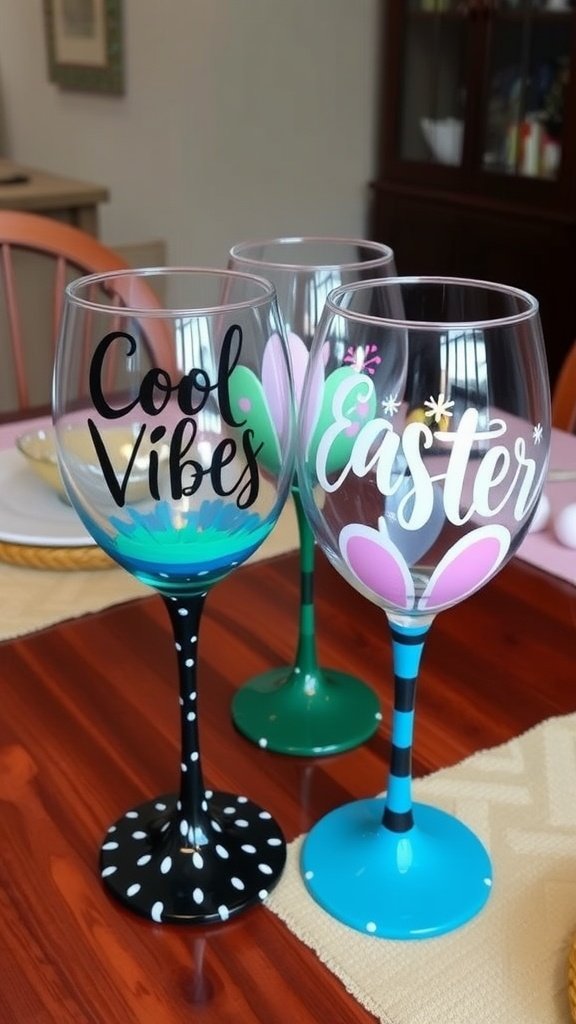
Custom painted wine glasses are a fun project that lets you show off your personality. These unique glasses can be great for personal use or as gifts. They make perfect items to sell, especially at local markets or online. The image features several beautifully painted wine glasses with fun designs and names, showcasing how creative you can get.
What you need to make the project:
- Clear wine glasses
- Glass paint or acrylic paint
- Paintbrushes
- Painter’s tape (optional)
- Sealer spray (for durability)
How to make the project:
- Start by cleaning the glasses thoroughly to ensure paint adheres well.
- If you’re using painter’s tape, apply it to create clean lines or patterns.
- Use your paintbrush to apply the paint. You can mix colors and create different designs.
- Allow the paint to dry completely. This can take a few hours.
- Once dry, spray a sealer to protect your design from washing off.
Extra tips:
- Try using stencils for more intricate designs.
- Let your creativity flow with colors and patterns—there’s no right or wrong!
- Make sure to hand wash the glasses to keep your designs intact.
8.Hand-Painted Plant Pots
Hand-painted plant pots are a fun and creative way to add a personal touch to your home or garden. They not only brighten up your space but also make great gifts or easy DIY crafts make to sell. Imagine pots bursting with color and unique designs that reflect your style!
To get started, here’s what you need to make these lovely pots:
What you need to make the project:
- Terra cotta pots
- Acrylic paints in various colors
- Paintbrushes (different sizes)
- Sealer (optional)
- Plants or seeds
How to make the project:
- Start by cleaning the pots to ensure the paint adheres well.
- Choose your design. You can go for floral patterns, geometric shapes, or even fun quotes.
- Using a paintbrush, apply your base colors first and let them dry.
- Add details and layers as you go. Don’t be afraid to mix colors!
- Once your design is complete, let it dry thoroughly. For added protection, apply a sealer.
- Finally, fill the pots with soil and plant your favorite greenery!
Extra tips:
- Experiment with different brush techniques for varied effects.
- For a more rustic look, consider distressing the paint with sandpaper.
- These pots also make fantastic gifts; consider adding a succulent or herb for a complete package!
With these hand-painted plant pots, you can create a charming display in your home or garden. Plus, they’re perfect crafts to make and sell DIY!
9. Easy DIY Crafts to Make and Sell: DIY Jewelry with Beaded Designs
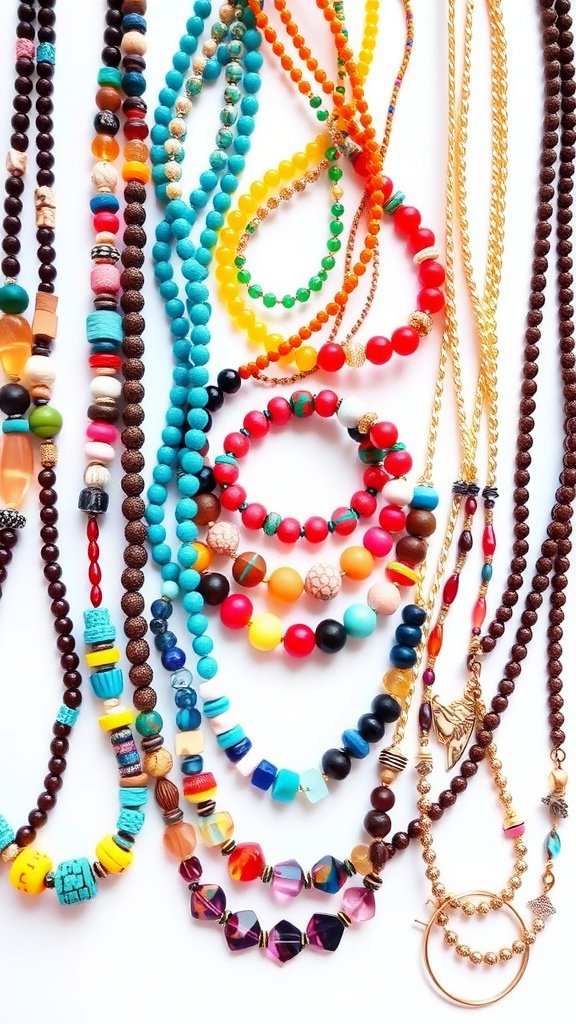
Creating your own jewelry with beaded designs is a fun and rewarding easy DIY craft to make and sell. Beads come in countless shapes, sizes, and colors, allowing for endless creativity. You can make necklaces, bracelets, or earrings that reflect your personal style or even make great gifts.
In the image, various colorful beads are beautifully arranged, showcasing their vibrant hues and textures. The playful arrangement invites you to explore your creativity. The black beads that spell out names add a quirky touch, suggesting that you can mix different styles and phrases into your jewelry.
Let’s dive into how to make your own beaded jewelry!
Many craft shops sell individual beads of many styles along with threading materials and clasps. Put them together and make your own unique designs.
10. Embroidered Home Decor Items
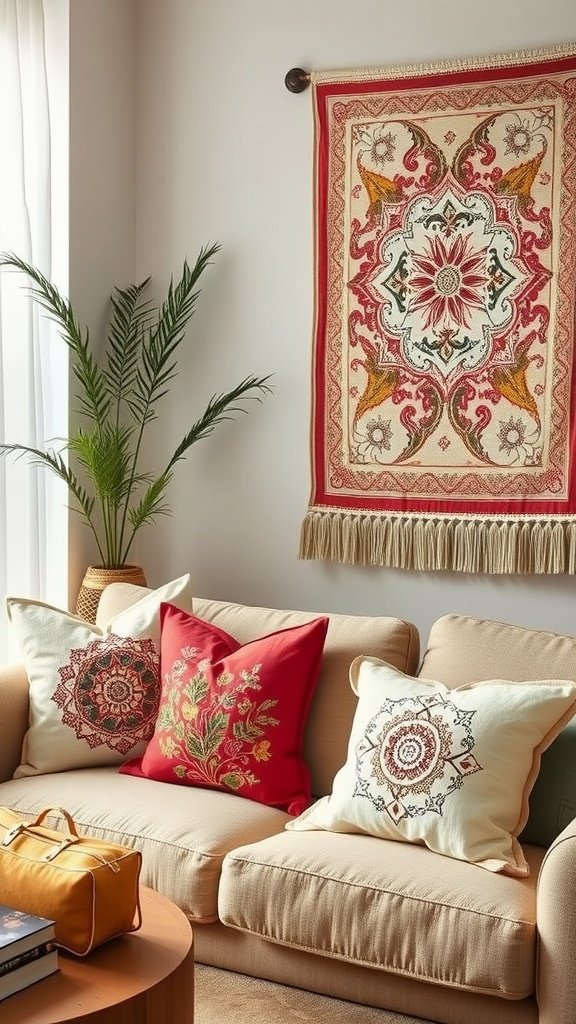
Embroidered home decor items can really brighten up any space. The image shows a cozy living room with a beautiful couch adorned with charming embroidered pillows. The floral designs add a touch of nature and warmth, making the space inviting.
Creating your own embroidered decor can be fun and rewarding. You can turn simple fabrics into stunning pieces that can be sold or kept for personal use. Let’s dive into how you can make some lovely embroidered items!
You can buy ready-made kits with the patterns and cottons included or design your own on grids. You can even embroider your own creations onto plain cloth or items of clothing for even more fun. A creative way to make easy DIY crafts to make and sell.
11. Easy DIY Crafts to Make and Sell: Personalized Photo Frames
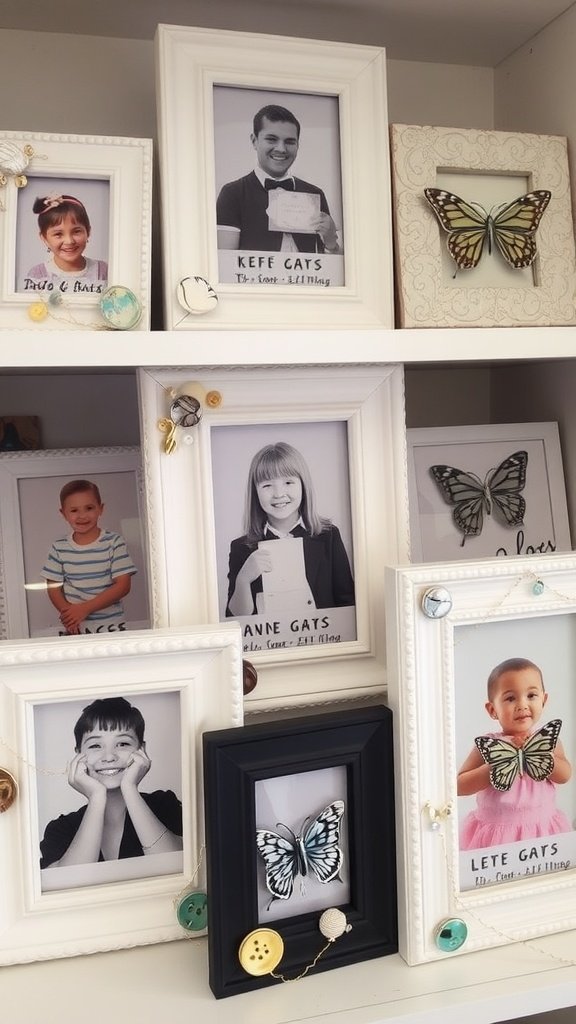
Personalized photo frames make for fantastic easy DIY projects to make and sell. They add a special touch to any picture and can be great gifts. Plus, they are easy to create and can be sold for a nice profit.
The image shows a lovely arrangement of various frames. Some have elegant designs, while others are simple and modern. This variety can inspire your own creations. You can customize these frames with different colors, styles, and decorations.
Add items like shells, buttons and beads to make your own designs or buy plain frames and paint them with your own creations. You could even start from scratch with bits of wood and dowel and craft your own unique frames.
12. Fabric Scrap Quilts
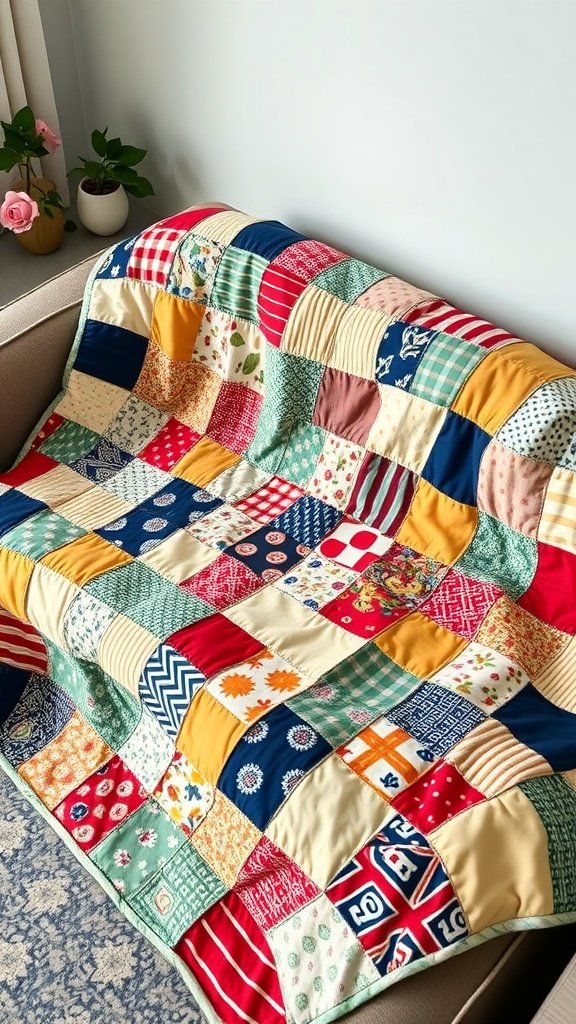
Fabric scrap quilts are a wonderful way to turn leftover pieces of fabric into something beautiful and useful. The image shows a colorful quilt, showcasing a mix of patterns and fabrics. This quilt is not just a cozy cover; it’s a collection of memories and creativity.

Making a quilt from fabric scraps is also a great project for those looking for easy DIY crafts to make and sell. You can personalize your quilt with remnants from old clothes or fabric from past projects, which adds a unique touch that buyers will appreciate.
13. Easy DIY Crafts to Make and Sell: Crocheted Coasters

Crocheted coasters are a fun and colorful way to protect your surfaces while adding a personal touch to your home. The image shows a vibrant assortment of coasters in shades of red, yellow, turquoise, and pink. Each piece features a unique, floral design that adds character to any coffee table or side table.
Creating your own crocheted coasters is not only enjoyable but also a great opportunity to sell a handmade item. Here’s how you can make these charming accessories.
What you need to make the project:
- Yarn in various colors
- Crochet hook (size recommended for your yarn)
- Scissors
- Tape measure (optional)
How to make the project:
- Start with a slip knot and chain 6 stitches, then join to form a ring.
- In the ring, crochet 12 double crochets to create the first round.
- For the second round, make 2 double crochets in each stitch (24 stitches total).
- Continue to add rounds, increasing stitches to shape the coaster as desired, while incorporating any decorative stitches.
- Finish with a round of single crochet to give it a polished edge, then cut the yarn and weave in the ends.
Extra tips:
- Experiment with different colors and patterns to make each coaster unique.
- Try using cotton yarn for better absorbency.
- Check for local craft fairs or online marketplaces where you can sell your coasters.
14. Painted Wooden Signs for Home Decor
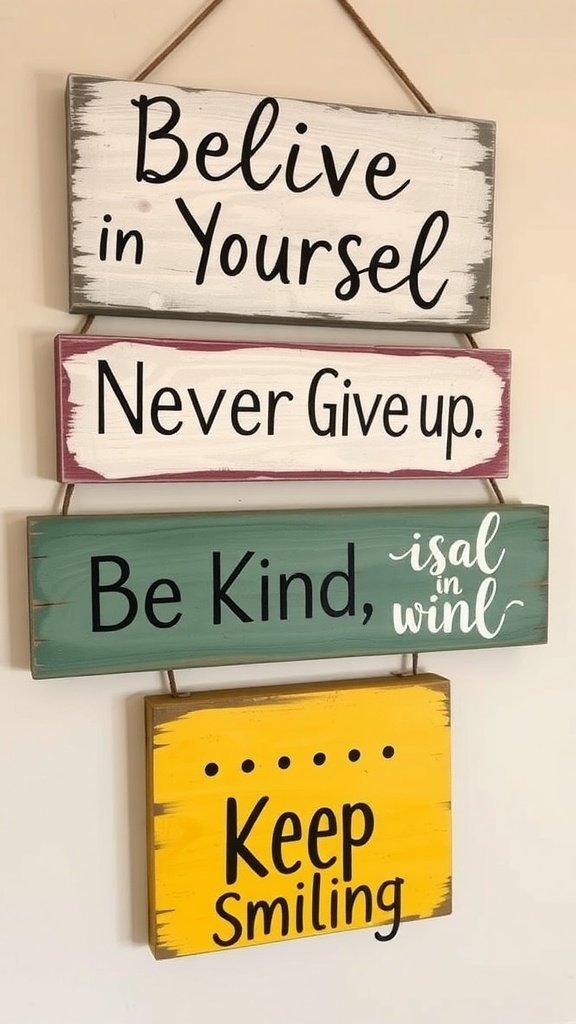
Painted wooden signs are a fun and creative way to add a personal touch to any home. The image showcases a collection of charming signs with a mix of playful and meaningful messages. These signs can complement various decor styles and make great conversation starters.
What you need to make the project:
- Wooden boards (varying sizes)
- Acrylic paints (multiple colors)
- Paintbrushes (various sizes)
- Stencils or painter’s tape
- Sealer (optional for outdoor use)
- Hanging hardware (if desired)
How to make the project:
- Start by sanding the wooden boards to create a smooth surface.
- Decide on a design or message. You can use stencils or painter’s tape for clean lines.
- Paint the background of the sign in your chosen color and let it dry completely.
- Once dry, paint the letters or designs using contrasting colors. Allow this to dry as well.
- If you want your signs to last outdoors, apply a sealer once everything is dry.
Extra tips: Use a mix of fonts and colors to create visual interest. You can also experiment with distressing the edges for a rustic look. These painted wooden signs are not just easy DIY crafts to make and sell; they can also be great gifts for friends and family!
15. Easy DIY Crafts to Make and Sell: DIY Natural Bath Bombs
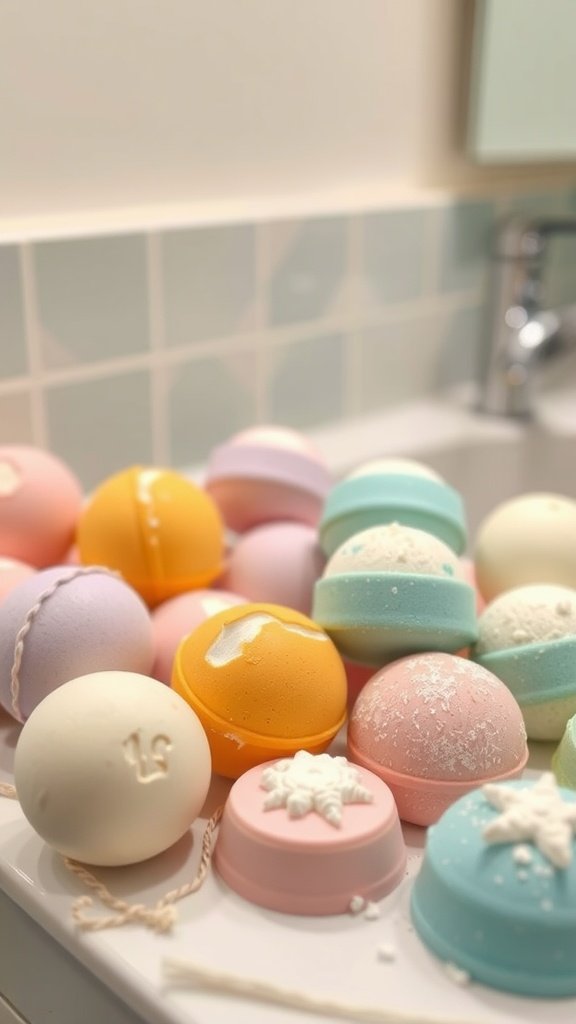
Bath bombs are a fantastic DIY project that combines fun and relaxation. They add color and fizz to bath time, making them perfect for self-care or gifts. The vibrant colors and unique shapes in the image show how creative you can get with this craft.
To make your own natural bath bombs, gather the right ingredients. You’ll need baking soda, citric acid, Epsom salt, essential oils, and food coloring for that pop of color. You can also add dried flowers or glitter for an extra touch!
Here’s how to make them:
What you need:
1 cup baking soda
1/2 cup citric acid
1/2 cup Epsom salt
2.5 tablespoons of oil (coconut or olive)
Essential oils (like lavender or eucalyptus)
Food coloring
Molds (silicone molds work great!)
How to make it:
1. In a large bowl, mix the dry ingredients: baking soda, citric acid, and Epsom salt.
2. In a separate bowl, combine the wet ingredients: oil, essential oils, and food coloring.
3. Slowly add the wet mixture to the dry mix, stirring constantly until it has a crumbly texture.
4. Pack the mixture tightly into your molds.
5. Let them dry for 24 hours, then pop them out and enjoy!
Extra tips:
Experiment with scents and colors! You can create seasonal or themed bath bombs. Wrap them in cellophane for added flair if you plan to sell them. Remember to keep them in a cool, dry place to maintain their fizz.
16. Handmade Soap with Natural Ingredients
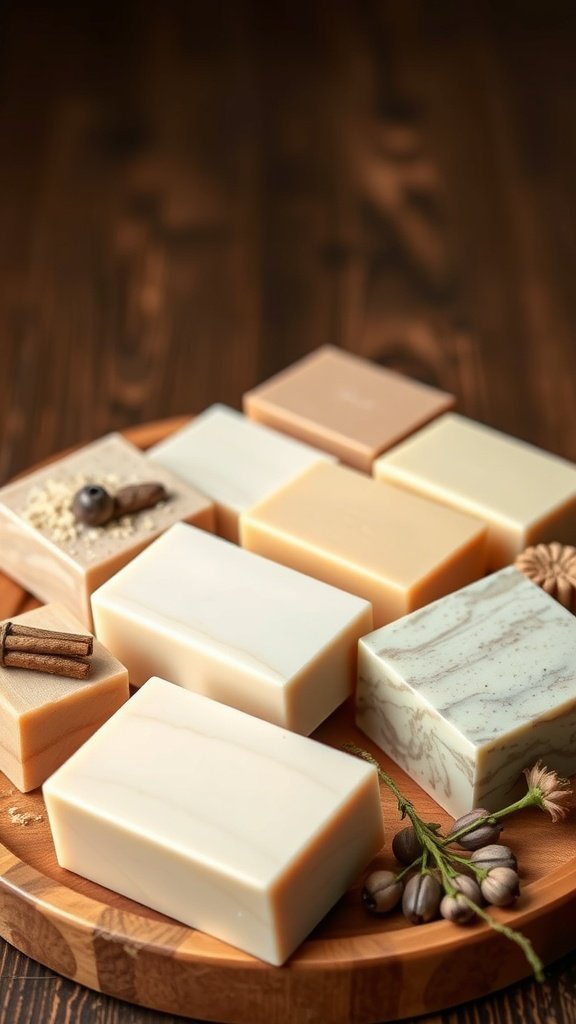
Making handmade soap is a fun and rewarding project. The image shows a beautiful assortment of natural soaps. These bars come in different colors and textures, showcasing the creativity you can have with this craft.
To get started, here’s what you need:
What you need to make the project:
- Soap base (glycerin or shea butter)
- Essential oils for fragrance (like lavender or tea tree)
- Colorants (natural options like mica powders)
- Molds (silicone molds work great)
- Mixing tools (spatula and microwave-safe bowl)
- Optional: dried flowers or herbs for decoration
How to make the project:
- Start by cutting the soap base into small cubes and placing them in a bowl.
- Heat the soap base in the microwave until it’s melted, stirring every 30 seconds.
- Add a few drops of essential oil and colorant to the melted soap and mix well.
- Pour the mixture into molds, adding any dried flowers if you like.
- Let the soap cool and harden for a few hours.
- Once set, pop the soaps out of the molds and they’re ready to use or sell!
Extra tips:
- Experiment with different molds for unique shapes.
- Label your soaps with ingredients for a personal touch.
- Consider packaging them nicely to attract buyers.
Handmade soap is one of the great crafts to make and sell DIY. It’s not only practical but also allows for plenty of creativity.
17. Easy DIY Crafts to Make and Sell: DIY Pet Toys from Upcycled Materials
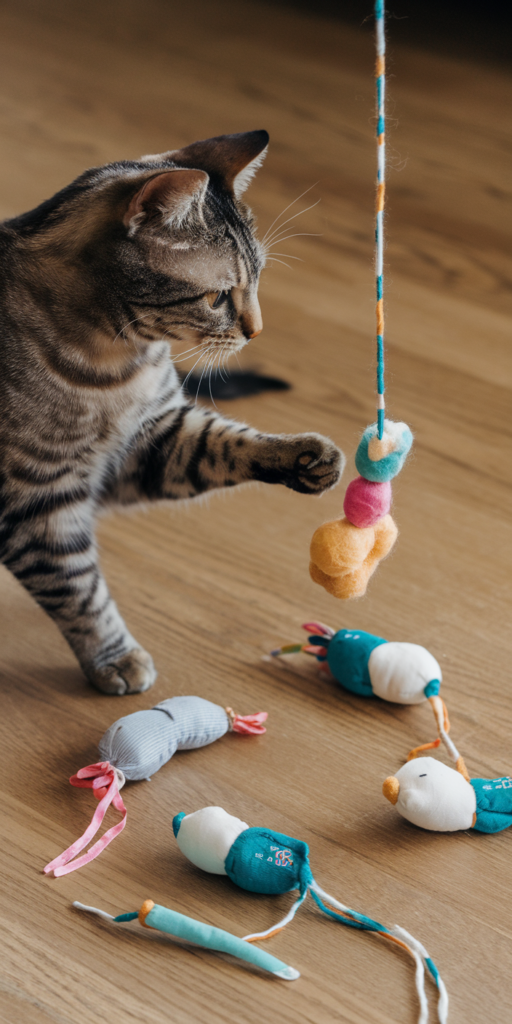
Creating DIY pet toys is a fantastic way to have fun while being gentle on the planet. The image shows a colorful array of pet toys made from upcycled materials. These toys are not only engaging for pets but can also be made easily at home.
18. Felt Animal Softies
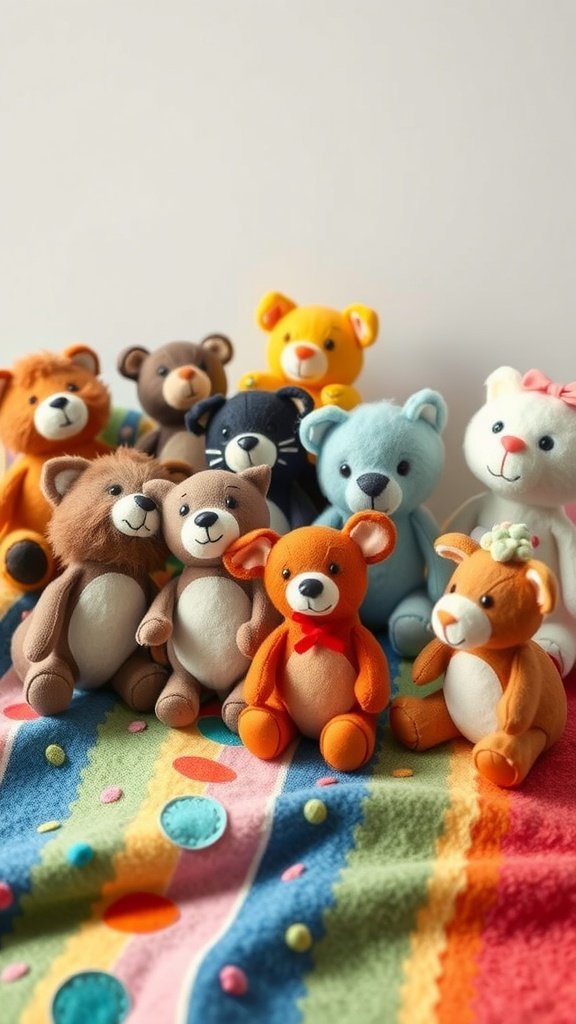
Felt animal softies are adorable little plush creations that bring joy to both kids and adults. These colorful critters are not just cute; they are also simple to make and can sell well in local markets or online shops. They can easily be customized to fit various themes or colors, making them a versatile option for anyone looking to create crafts to make and sell DIY.
To get started, here’s what you need to make these charming softies: colored felt sheets, scissors, fabric glue, stuffing, and sewing thread. You might also want some buttons or embroidery thread for added decoration.
Here’s how to make your own felt animal softies:
What You Need:
- Colored felt sheets
- Scissors
- Fabric glue
- Stuffing (polyester fiberfill works great)
- Sewing thread
- Optional: buttons, embroidery thread
How to Make:
- Choose an animal design and cut two identical shapes from your felt sheets.
- Cut out smaller felt pieces for facial features and other decorations.
- Using fabric glue, attach the smaller pieces to one of the larger felt shapes.
- Once the glue is dry, place the two larger pieces together, wrong sides facing out.
- Sew around the edges, leaving a small gap for stuffing.
- Turn the softie inside out, stuff it with fiberfill, and sew the gap closed.
Extra Tips:
- Use bright colors to catch the eye, especially for a children’s market.
- Mix and match designs to create a unique collection.
- Consider adding a small tag with your brand name for a personal touch.
19. Easy DIY Crafts to Make and Sell: Repurposed Vintage Furniture
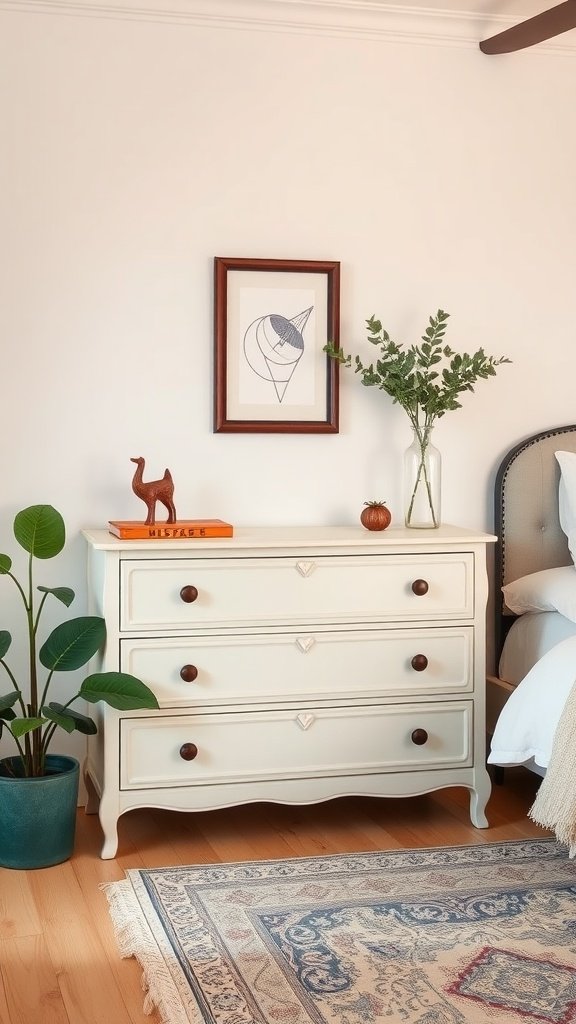
Repurposed vintage furniture is a fantastic way to bring a unique flair to your home. The image shows a charming vintage dresser that has been refreshed with a soft, neutral color. The wooden knobs add a warm touch, making it a perfect piece for any room.
Turning old furniture into trendy items is not only eco-friendly but also a smart way to make some extra cash. Vintage pieces are in high demand, so you can create beautiful items that resonate with buyers.
Here’s an easy DIY craft to make and sell that you can try:
What You Need to Make the Project:
- Old dresser
- Sandpaper
- Primer and paint
- New knobs (optional)
- Brushes and a roller
- Sealant (for durability)
How to Make the Project:
- Start by sanding the dresser to remove any old paint and smooth the surface.
- Apply a coat of primer to help the paint adhere better.
- Once the primer is dry, paint the dresser with your chosen color. A soft white or pastel shade can modernize the look.
- Add new knobs if you want a fresh detail. This can really change the look.
- Finish with a sealant to protect your work and ensure longevity.
Extra Tips:
- Always work in a well-ventilated area.
- Take your time with the sanding for a smooth finish.
- Consider adding stencils or decals for a unique design.
Repurposing furniture is one of the best crafts to make and sell DIY. Your creativity can lead to beautiful home decor that others will love!
20. Seasonal Wreaths for Front Doors
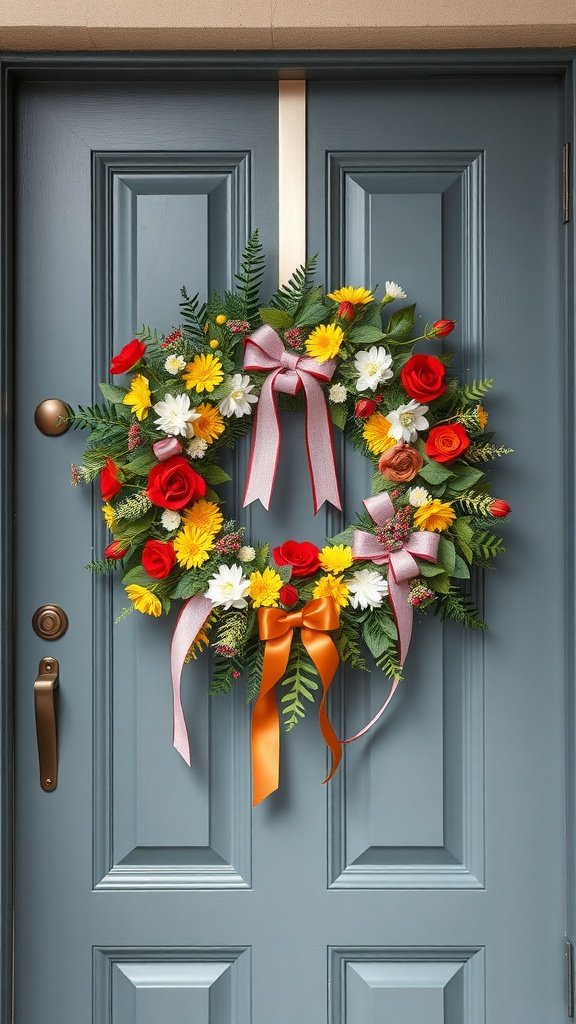
Seasonal wreaths add a warm touch to any front door. They welcome guests and set the mood for the season. The image shows a vibrant wreath full of colorful flowers and lush greenery, perfect for spring or summer. This can be a fun and easy project to create and sell.
What you need to make the project:
- A foam or straw wreath base
- Colorful faux flowers (roses, daisies, etc.)
- Greenery (fern leaves or similar)
- Hot glue gun and glue sticks
- Ribbons for bows
- Wire or ribbon for hanging
How to make the project:
- Start by cutting the flowers and greenery to your desired lengths.
- Arrange the flowers on the wreath base without gluing to see how they fit.
- Once satisfied, glue the flowers and greenery onto the base, starting from one side and working your way around.
- Add bows made from ribbons to give it a polished look.
- Attach a hook or ribbon at the top for easy hanging.
Extra tips:
- Mix different flower types to create depth and interest.
- Use seasonal colors to match holidays or events.
- Consider making custom orders for customers wanting specific colors or themes.
21. Easy DIY Crafts to Make and Sell: Unique Key Holders Made from Wood
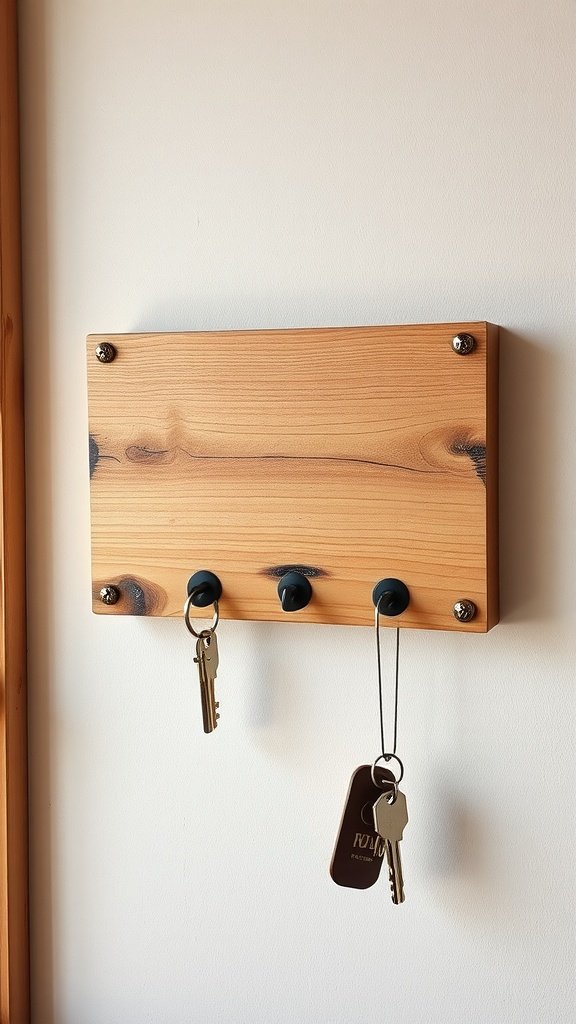
Wooden key holders are a stylish way to keep your keys organized while adding a touch of warmth to your home. This particular design features a simple wooden board with three hooks, perfect for holding multiple keys. The natural grain of the wood gives it a rustic charm that’s hard to resist.
Creating your own key holder is not just fun, it’s also a great item to sell. Many people look for unique ways to keep their spaces tidy, and a handmade wooden key holder fits the bill perfectly. Let’s jump into how you can make one!
22. Handcrafted Greeting Cards
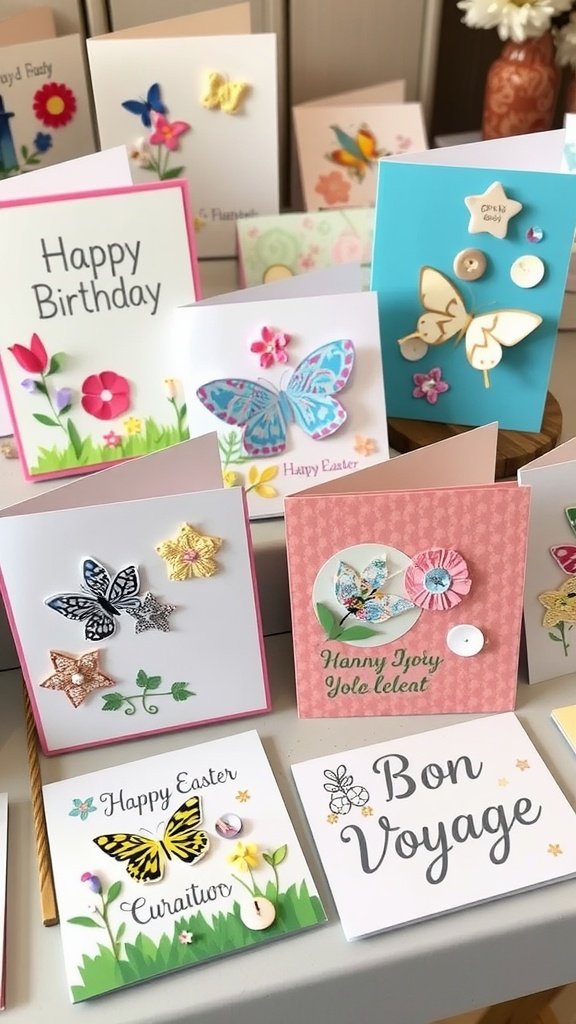
Handcrafted greeting cards are a delightful way to spread joy and creativity. The image shows a variety of beautifully designed cards that can be made at home. Each card is unique, featuring vibrant colors and thoughtful messages.
What you need to make the project:
- Heavy cardstock or blank cards
- Colored pens and markers
- Stickers or embellishments
- Glue or double-sided tape
- Scissors
How to make the project:
- Start by choosing your cardstock or blank cards.
- Decide on a theme or message for your card.
- Use pens and markers to create designs or write heartfelt messages.
- Add stickers or embellishments to enhance the look.
- Once finished, let the cards dry if you used glue, and they’re ready to be gifted!
Extra tips:
- Consider making a variety of cards for different occasions.
- Try using recycled materials for a unique touch.
- Host a card-making party to make the process more fun!
These easy DIY crafts to make and sell can be a great way to earn some extra cash while expressing creativity.
23. Easy DIY Crafts to Make and Sell: DIY Essential Oil Rollers

DIY essential oil rollers are a fun and useful project that anyone can try. They are perfect for personal use or for selling at craft fairs. The image shows beautiful bottles of essential oils, which are the stars of this project.
These rollers can be customized with different essential oils to create blends that suit various needs, like relaxation or energy. It’s a simple way to make something special that you can share with others.
24. Stenciled Tote Bags
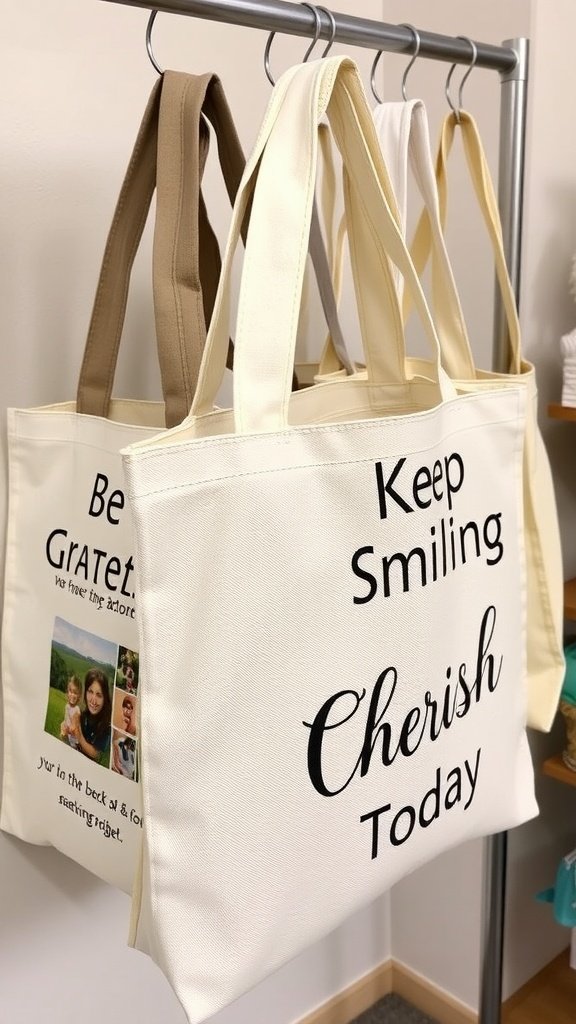

Stenciled tote bags are a fun and simple project that can add a personal touch to your everyday carry. These bags are not only practical but also stylish. You can create unique designs that showcase your personality or make great gifts for friends and family.
What you need to make the project:
- Plain canvas tote bags
- Fabric paint or spray paint
- Stencils (you can buy or create your own)
- Masking tape
- Cardboard (to insert into the bag)
- Brush or sponge (if using paint)
How to make the project:
- Start by laying the tote bag flat and inserting cardboard inside to prevent paint from leaking through.
- Secure the stencil on your bag using masking tape.
- Apply fabric paint with a brush or sponge, making sure to cover the stencil evenly.
- Carefully remove the stencil and let the paint dry completely before using the bag.
Extra tips:
- Experiment with different colors and patterns to create a collection.
- Consider adding your own quotes or phrases for a personal touch.
- These bags make great items to sell at local markets or online, as they are easy to customize and appealing to buyers.
25. Easy DIY Crafts to Make and Sell: DIY Holiday Ornaments
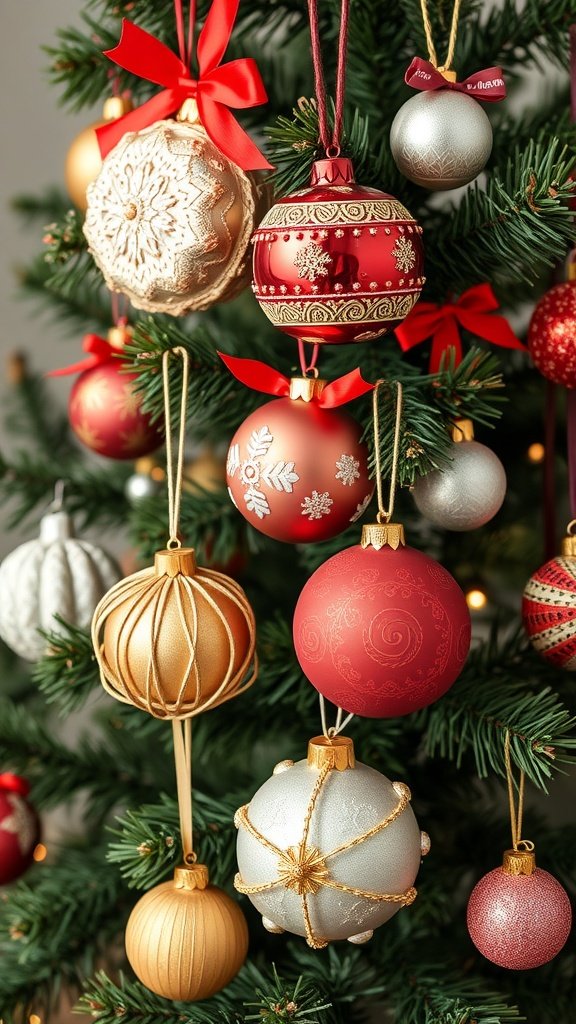
Creating unique holiday ornaments is a fun way to add personal touches to your decorations. The image shows a variety of colorful ornaments hanging from a Christmas tree, showcasing a mix of traditional and modern designs. Using your own creativity, you can craft ornaments that not only enhance your home but also make great gifts or items to sell.
Here’s how to get started with your own DIY ornaments!
You can purchase styrofoam balls from craft shops, along with paints, ribbons, beads and decorations to put together your own unique holiday ornaments. Another way is to use discarded items like cotton reels and decorate them in your own unique style.
26. Upcycled Bottle Planters
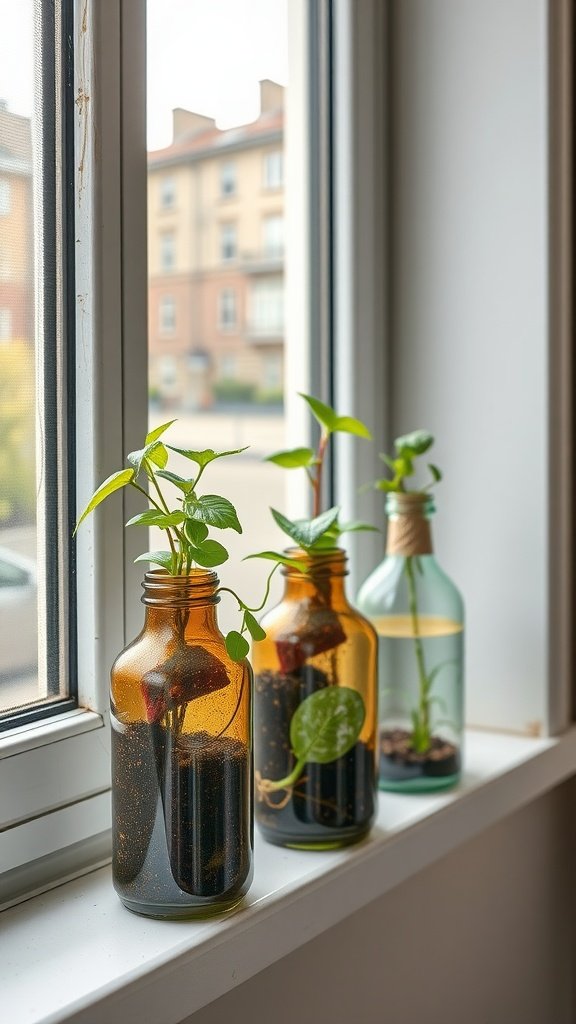
Upcycled bottle planters are a creative and eco-friendly way to bring some greenery into your home. These unique planters not only look great but also help reduce waste by giving old bottles a second life. It’s a fun project that’s simple enough for anyone to tackle.
To get started, you’ll need a few materials. Gather some glass or plastic bottles, potting soil, and your favorite small plants or herbs. The bottles can be any shape or size; just make sure they have a wide enough mouth for your plants.
27. Easy DIY Crafts to Make and Sell: Colorful Paper Mache Bowls
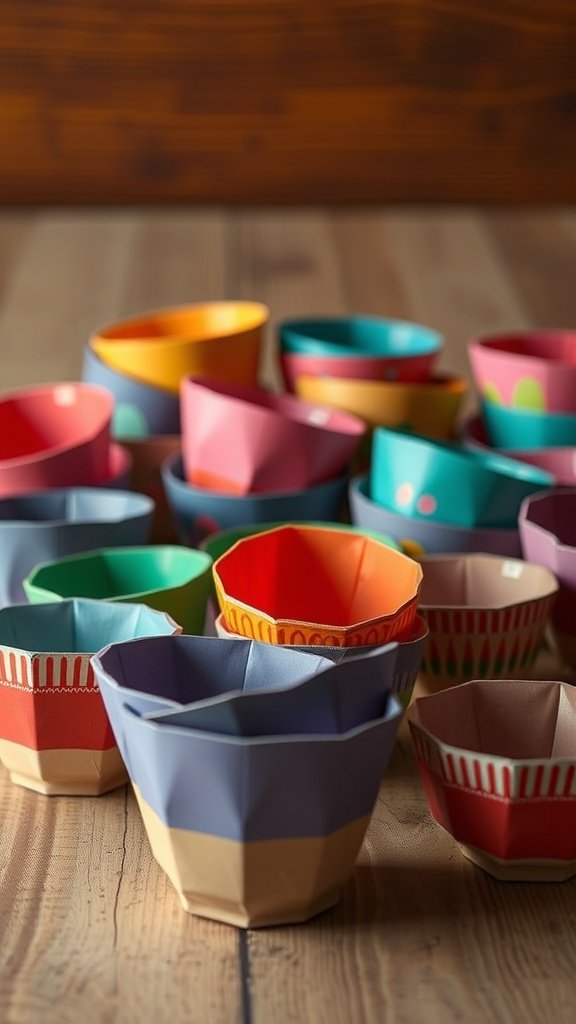
Making colorful paper mache bowls is a fun and simple project. These bowls are not only eye-catching but also functional. You can use them for storage, decoration, or even as gifts. Plus, they fit perfectly into the category of easy DIY crafts to make and sell.
What you need to make this project includes basic supplies like newspaper, flour, water, balloons, and paint. You can also use decorative items like markers or stickers to personalize your bowls.
How to make the project is pretty straightforward. Start by tearing the newspaper into strips. Next, mix equal parts flour and water to create your glue. Inflate a balloon and dip the newspaper strips into the glue mixture. Layer them over the balloon until it’s covered. Let it dry completely, then pop the balloon and paint your bowl in vibrant colors.
Extra tips include using a variety of colors for a more dynamic look. Experiment with different sizes of balloons for various bowl sizes. Don’t forget to seal your bowls with a clear coat to protect the paint. This project is not just a creative outlet, but it could also turn into a small business venture!
28. Handcrafted Potpourri Blends
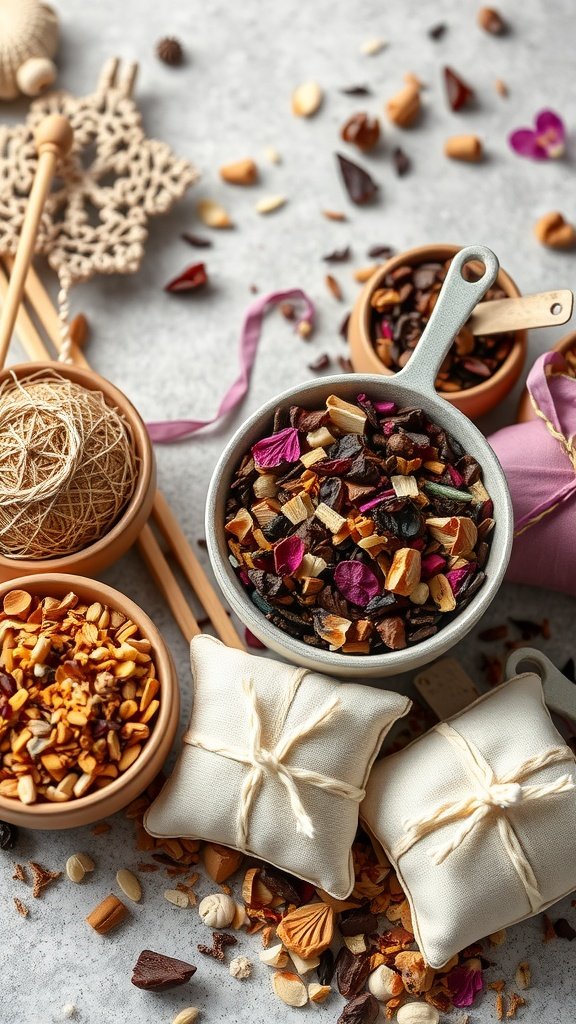
Creating your own potpourri blends is a fun and rewarding project. The image showcases a variety of ingredients that can be used to make beautiful and fragrant potpourri. You can mix dried flowers, spices, and essential oils to create a unique scent that brightens up any space.
Here’s how to get started with this easy DIY craft project that you can make and sell.
What You Need to Make the Project
- Dried flowers (like rose petals or lavender)
- Dried herbs (like rosemary or mint)
- Spices (like cinnamon sticks or cloves)
- Essential oils (choose your favorite scents)
- Small cloth bags or jars for packaging
- String or ribbon to tie the bags
How to Make the Project
- Start by mixing your dried flowers, herbs, and spices in a bowl. Adjust the quantities based on your scent preference.
- Add a few drops of essential oils to the mixture. Stir well to ensure the oils are evenly distributed.
- Once you’re happy with the blend, scoop it into small cloth bags or jars. Make sure to leave some space at the top.
- If using bags, tie them securely with string or ribbon. For jars, consider adding a decorative label.
Extra Tips
- Experiment with different combinations to find your favorite scents. You can even create seasonal blends!
- Consider using natural dyes or colored flowers for an attractive look.
- Market your potpourri as a natural air freshener or gift item for holidays and special occasions.
29. Easy DIY Crafts to Make and Sell: Handmade Crochet Bags
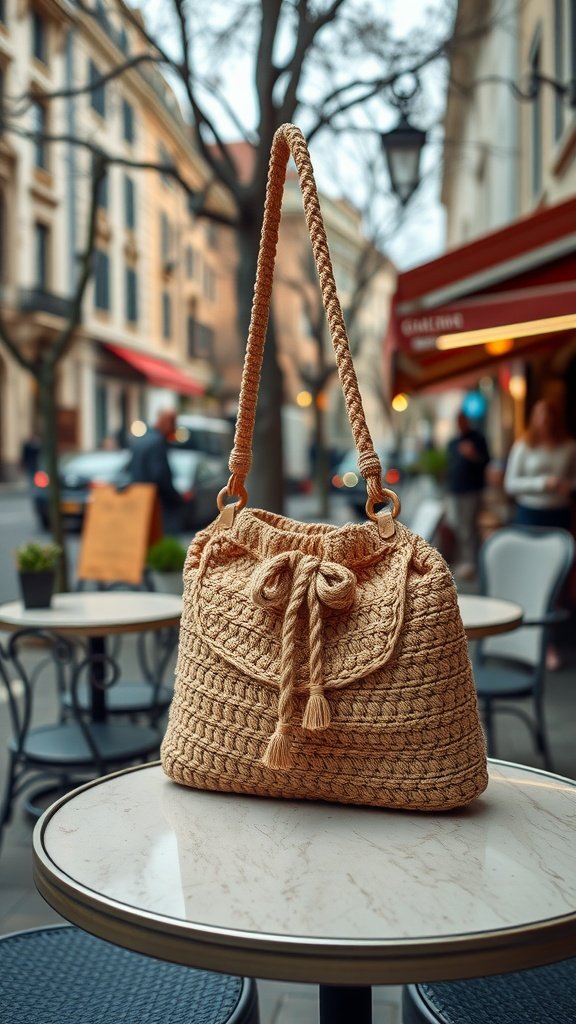
Handmade crochet bags are a trendy choice for anyone wanting to make something special. The image shows a lovely crochet bag sitting on a table, perfect for a casual day out. These bags are not just functional; they can also be a statement piece.
To get started on making your own crochet bag, here’s what you need:
- Yarn (choose a color you love)
- Crochet hook (size depends on your yarn)
- Scissors
- Tapestry needle (for weaving in ends)
Now, let’s talk about how to make this project:
- Start with a foundation chain. The length will depend on how wide you want your bag.
- Work in rows, using single or double crochet stitches. Keep going until you reach your desired height.
- Create a flap for the top by adding a few more rows. Don’t forget to leave some space for the opening!
- For the straps, you can braid some yarn or use a chain stitch that matches the bag.
- Finally, weave in any loose ends with the tapestry needle.
Extra tips: Using a sturdy yarn will ensure your bag holds its shape. You can also add embellishments like buttons or patches for a unique touch. Selling these bags can be a fun way to showcase your creativity while making some extra cash. They are among the best easy DIY crafts to make and sell!
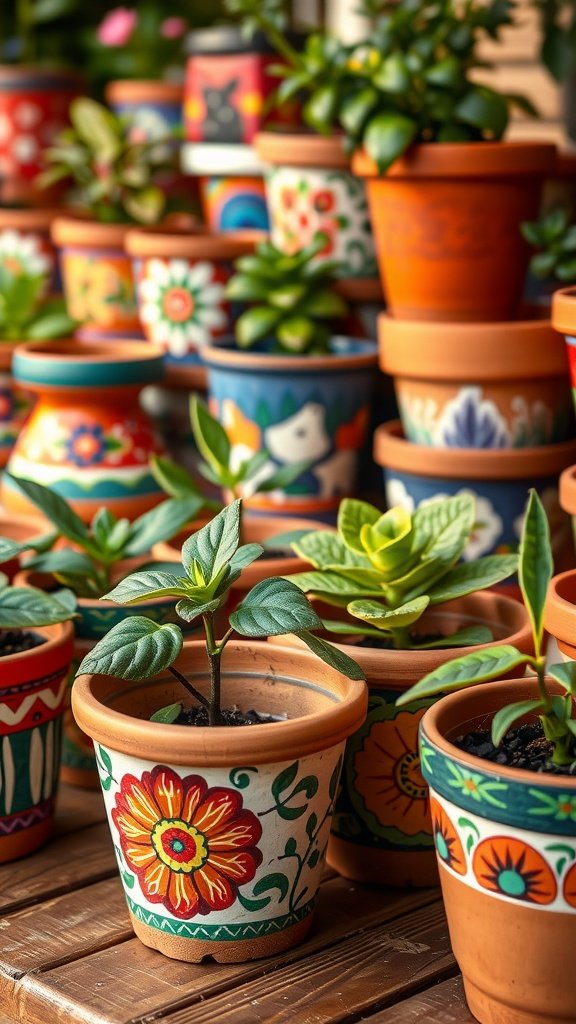
30. Hand-Painted Terracotta Pots
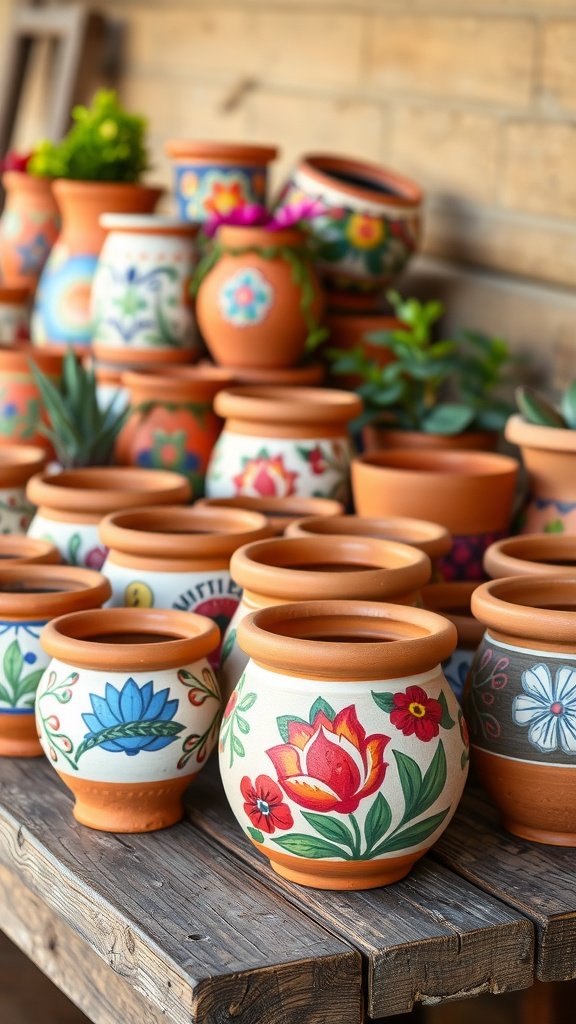
Hand-painted terracotta pots are a delightful way to add a personal touch to your gardening or home decor. The vibrant colors and artistic designs make these pots not just functional, but also beautiful pieces of art. They catch the eye and can brighten any space, making them perfect for selling.
To create your own hand-painted terracotta pots, here’s what you’ll need:
What you need to make the project:
- Terracotta pots (various sizes)
- Acrylic paint in various colors
- Paintbrushes (various sizes)
- Sealant (optional, for outdoor use)
- Palette or mixing tray
- Pencil for sketching designs
How to make the project:
- Start by cleaning your terracotta pots to remove any dust or dirt.
- Use a pencil to lightly sketch your desired design on the pot.
- Pick your colors and start painting! Use different brush sizes for details.
- Allow the paint to dry completely. If using a sealant, spray it on after the paint dries.
- Let everything cure for a day before using the pots outdoors.
Extra tips:
- Mix colors together to create unique shades.
- Use stencils for more complex designs.
- Consider adding drainage holes if using them for plants.
- Place them in sunny spots to showcase their colors.
These pots make fantastic crafts to make and sell DIY, drawing attention from customers who appreciate handmade items.
31. Easy DIY Crafts to Make and Sell: Customizable Fabric Tote Bags
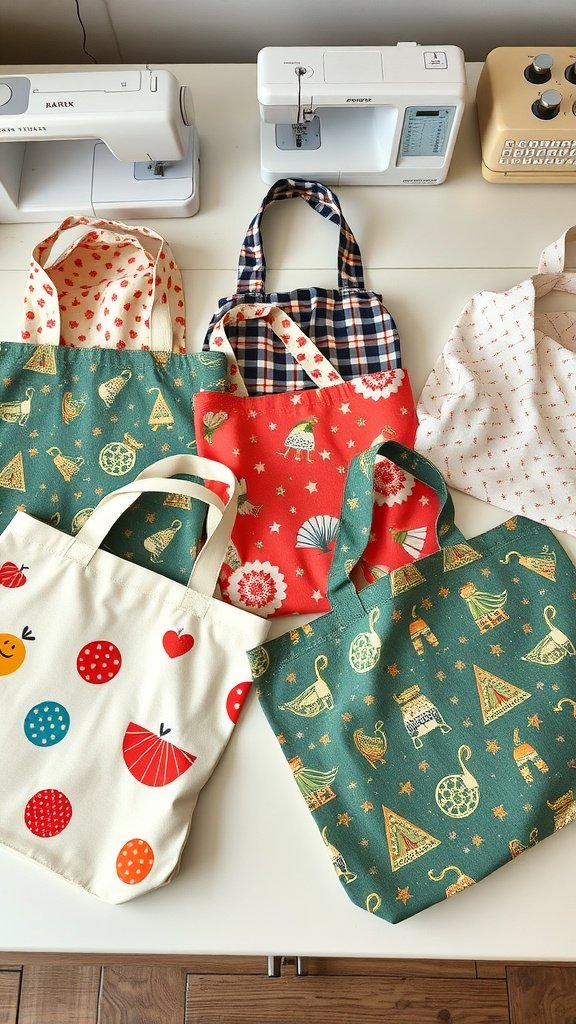
Creating customizable fabric tote bags is a fun and practical project that anyone can try. These bags are not only useful for shopping but also make great gifts or items to sell. The image shows a colorful assortment of tote bags, each with unique designs, waiting to be personalized.

To get started, here’s what you’ll need to make your own customizable fabric tote bags.
What You Need to Make the Project
- Canvas fabric in various colors and patterns
- Fabric scissors
- Thread matching the fabric colors
- Sewing machine (or needle for hand stitching)
- Iron
- Optional: fabric paint or markers for customization
How to Make the Project
- Cut the fabric into two rectangles (about 15×15 inches for a standard tote). These will form the front and back of the bag.
- Cut two strips of fabric (about 20 inches long and 3 inches wide) for the handles.
- Place the two rectangles together, right sides facing each other, and sew around the edges, leaving the top open.
- For the bottom corners, pinch the corners together and sew across to create depth. This step adds a nice touch and extra space inside the bag.
- Next, fold down the top edge about an inch and sew to create a hem. This will make your bag look neat.
- Attach the handles by pinning them inside the bag at the top and sewing securely.
- If you want to personalize your tote, use fabric paint or markers to add designs or messages on the front.
- Finally, iron the bag to smooth out any wrinkles.
Extra Tips
- Mix and match different fabrics to create unique designs.
- Consider using thrifted fabrics for an eco-friendly touch.
- Practice different stitching techniques to add flair.
These customizable fabric tote bags are a fantastic project to explore. They fit perfectly into the realm of easy DIY crafts to make and sell, appealing to buyers who appreciate handmade items. Enjoy the process, and let your creativity shine!